Revision and Omar Khayyam

The Moving Finger writes; and, having writ,
Moves on: nor all thy Piety nor Wit
Shall lure it back to cancel half a Line,
Nor all thy Tears wash out a Word of it.

* * *

That powerful verse from The Rubaiyat of Omar Khayyam must surely resonate with every adult of a certain age who reads it.

Fortunately for us on The Kill Zone, however, Mr. Khayyam wasn’t writing about writing. Authors can indeed go back and cancel half a line, delete a few sentences, or even start the whole darn thing over from scratch. So, let’s talk about revision.

* * *

There are a variety of opinions on the need to revise a manuscript. Here are a few:

Clearly, not everyone agrees on the need to revise, or how much time should be spent on it. But for those who do favor spending that time, how should they approach the revision process?

* * *

In my limited experience, revision is a serious part of my writing. Although I don’t keep detailed time sheets, I’m guessing I spend at least half my time revising. (When I talk about revision, I’m not talking about fixing grammar, typos, or punctuation mistakes. Those can be fixed by software and good editors. To me, revision concerns the story itself, the way it ebbs and flows, how the underlying theme plays out, and the rhythm of the words.)

My first draft is an act of getting the story out of me and onto the page. Some of it may be good, but some of it is just plain vanilla story-telling without any spice. Revision is an opportunity to transform that first story idea into an entertaining, thought-provoking novel. But it’s also a balancing act. How do I keep the voice, the tone, the essence of the thing I created while changing it? It’s like trying to make sure you don’t spoil the wine while polishing the cup it’s in.

* * *

There are plenty of books and online resources with information about how to revise, but here are a few pieces of advice I’ve found helpful:

  1. To get a clear perspective of your work, take some time off between finishing the first draft and starting the revision process. (Sue Coletta wrote a TKZ post on Critical Distance last week.)
  2. After taking the break (which may last a week or a month), read through the first draft at one sitting, if possible. Some craft experts recommend printing the manuscript so that it’s easy to make notes on the pages.
  3. Review the overall arc of the plot: I use Scrivener’s outline feature to get the number of words in each chapter, and I add a sentence or two to describe the timeframe and goal for each chapter. Then I download this to a spreadsheet and calculate the percentage through the book for each milestone. I may rearrange the chapters (easy to do in Scrivener) or even delete sections that don’t serve the story. I may add new scenes or chapters.
  4. Revisit the characters. Is the main character well-defined and can you trace his/her arc through the plot? Do the secondary characters add spice to the story?
  5. Reread each scene. Does it tell a story in itself? Does it end with a reason for the reader to turn the page? Is the dialogue snappy?
  6. Check the pacing. Does the pacing give the reader a chance to catch his/her breath after a tense scene?
  7. Back to the beginning. Review the first sentence, the first paragraph, the first page of the manuscript. Will this hook a reader?
  8. Get feedback from Beta readers. Their first-time-through reactions are invaluable.
  9. Never Give Up

This list appears to be linear, but my process is more iterative. I go back through steps #3-#7 as many times as I think I need to, and I employ a developmental editor and a copy editor to help me refine my work. I also have the good fortune to have a novelist husband who listens to my concerns and helps me figure out how to solve all the little problems that pop up as I make my way through this labyrinth called Writing.

  • So, TKZers: How important is revision to you?
  • What steps do you take to revise your manuscript?
  • What percentage of your writing time is spent revising?

Tricks & Tips for Catching All Those Little Typos in Your Own Work

by Jodie Renner, fiction editor & author of writing guides

Whether you’re writing a blog post, a magazine article, a short story, an assignment, or a book, it’s important to go over your work several times to make sure it’s polished and flows well. No matter what your you’re writing, you’re your credibility will be eroded if readers find mispelled misspelled words, misused words, missing or extra words, or other typos. And  a recent study published in Huffington Post points to a close correlation between accuracy of writing and income from writing — a no-brainer.

I’ve presented workshops and written several articles (here’s a good one) on tips for approaching the whole editing and revising process, starting with macro issues like logistics, characterisation, plot, and pacing, and working your way through awkward phrasing and wordiness down to micro errors like spelling and punctuation. In fact, I’ll be presenting a workshop called “Revise for Success,” a step-by-step approach to revising your novel, at Steven James’ writers conference, Troubleshooting Your Novel, in Nashville on January 17.

For a whole book on how to nail this critical process to create a novel that shines, check out James Scott Bell’s excellent Revision & Self-Editing for Publication. Writers also find my Fire up Your Fiction very helpful.

For today, my topic is on that final step, after you’ve resolved all big-picture content problems and even most style issues, such as slow pacing, awkward sentence structure, or overly wordy phrasing. My tips today are on the final “proofreading” step, how to ferret out those tiny little gremlins that escape your notice when you’re concentrating on content and even style issues.

When we read our own work, we’re so familiar with what we want to say that we fill in words that aren’t actually on the page, and skip over slightly misspelled words that still pass spellcheck, or little words that shouldn’t be there. Of course, getting detail-oriented, eagle-eyed nerdy friends who are great at spelling to read it carefully is a great option, if you know of some. If not, or in addition to that, I’m providing some tips for fooling your brain into thinking it hasn’t read this story before.

As someone trained to see errors, I find them everywhere – on signs and menus, in blog posts and articles, on website copy, and in published books. As an example, here’s the description of a workshop that appeared on a conference website a while back, which I’ve shortened and disguised a bit. Can you spot the 9-10 errors in this description? (Just for fun, I’ve added a few more errors.)

Copy with little typos: One of the most important ways to connect with your audience an attract new readers is through author interviews and public readings. How can you master the the confidence and skills to successfully preform in front of an audience? There are a few time tested trick to perform you work well for an audience. This workshop will discuss techniques for speaking in pubic and will also cover using social media sites lie YouTube to to host audio versions of your work.

 Errors fixed in blue: One of the most important ways to connect with your audience and attract new readers is through author interviews and public readings. How can you master the confidence and skills to successfully perform in front of an audience? There are a few timetested tricks for performing your work well for an audience. This workshop will discuss techniques for speaking in public and will also cover using social media sites like YouTube to host audio versions of your work.

And I just happen to be judging short stories in the thriller genre for Writer’s Digest’s Popular Fiction 2014 contest, where I was given 147 short stories and asked to choose only 10 of those to go on to the next level. Since I have to reject 137 of these stories, I have to be pretty ruthless, and any that aren’t polished won’t make the cut. Typos or spelling errors on the first page are an automatic no. As are long boring descriptions, a confusing opening, cardboard characters, lack of tension or intrigue, tedious repetitions, and switches in verb tense.

Here are some tips for fooling your brain into thinking your story is something new, something you need to read critically and revise ruthlessly before it reaches the demanding eyes of a literary agent, acquiring editor, contest judge, or picky reviewer.

1. Set it aside for a while. First, if you can, put your article, blog post, or short story away for a day or two before revising and editing it, and your book manuscript away for a few weeks or even a month, if possible, so you can come back to it with fresh eyes and a bit of emotional distance. If you’re on a tight deadline, start at #2.

2. Start with Word’s spell-check and check those squiggly red and blue lines under words. Don’t rely on Spellcheck, though, as it misses a lot (like the well-known gaffe above, “pubic” for “public”), and often suggests changes that make something correct incorrect. For example, in the Agent Dallas thriller manuscript I’m editing for L.J. Sellers, The Trap, MS Word suggests that “I like your thinking” (as in “I like how you think”) should be “I like you’re thinking.” And it often suggests the wrong its/it’s, and misses all kinds of typos in manuscripts I edit, like “crowed” for “crowded,” “father” for “farther,” “county” for “country,” and “manger” or “manager.” So definitely don’t trust spell-check blindly.

3. Use my two quick, clickable e-resources to verify spelling and word choices: QUICK CLICKS: SPELLING LIST – Commonly Misspelled Words at Your Fingertips, and QUICK CLICKS: WORD USAGE – Precise Word Choices at Your Fingertips. Click on the titles to check them out. These handy resources will save you tons of time looking up words in the dictionary, and every word is verified as correct.

4. Do a search (“Find”) for words you know how to spell but tend to spell wrong when you’re in a hurry, especially ones spell-check won’t flag, like “you” for “your,” or “your” for “you’re,” “there” for “they’re” or “their,” etc.

Then choose some of the following strategies, which are also excellent for picking up on clunky sentences and awkward phrasing.

~ Increase the size of the type to 150% or 160%, by clicking on the + sign at the bottom right of the document.

~ Change the font to one that looks quite different to fool your eyes and brain into thinking this is new material you’ve never read (or thought of) before, so you need to pay close attention.

Try Comic Sansor Franklin Gothic Book or Book Antiqua.

~ Format it to book size, like 6″ x 9″, change the font to something nice, like Georgiaor Cambria, change it to single-spaced,  format it to two-column landscape, so it looks like an open book, then print it up and read it in a different location, somewhere you don’t write, preferably out of your home.

~ Send it to your Kindle or other e-reader and read it in a different location, preferably not at home.

~ In a print version, place a ruler or piece of paper under the line you’re reading to keep from skipping ahead. Or keep your finger under each word as you read.

~ Read it out loud. Wherever you stumble, your readers will, too. This will also help with punctuation. If you pause briefly, put in a comma. If you pause for longer, put in a period. (Best to avoid or minimize semicolons in fiction, and keep them right out of casual dialogue. And reserve exclamation marks for when someone is screaming or yelling, shocked, or in pain.)

~ Read the whole thing backwards or upside down (!). I’ve heard these suggestions, but haven’t actually done this myself, and probably won’t.

~ Get your computer to read it aloud to you, while you follow along. Newer versions of Word offer this, and Macs do, too. In Word 2010, for example, here’s how you enable text-to-speech: First, add “Speak” to the Quick Access Toolbar. Along the very top above “File,” the line that starts with W for word, at the far right is a down arrow. Click that. It will say “Customize Quick Access Toolbar.” Click “More Commands.” In the “Choose Commands” from the list, select “All Commands.” Scroll down to the “Speak” command, select it, and then click “Add.” Click “OK.” When you want to use the text-to-speech command, you’ll use the icon on the Quick Access Toolbar, which looks like a speech bubble on a cartoon. To hear some text read aloud, highlight the paragraph or chapter you want to hear aloud, then click the Speak icon on the toolbar.

Follow along the text while listening to the text being read aloud. Stop it whenever you need to add or delete a word, or fix awkward phrasing.

~ If you’re self-publishing, get a sample book printed by CreateSpace (or IngramSpark) and read it somewhere else in your home, in a room where you don’t work, or better yet, away from your home, like in a coffee shop, a park, or the beach. I read one of mine in book form, pen in hand, on vacation in Puerto Vallarta, while stretched out in a chaise longue under one of those grass huts, and I caught all kinds of repetitions, sentences that didn’t flow as well as they could, were too wordy, or generally needed polishing, etc., as well as the odd typo.

Writers – do you have any other strategies to add for catching all those little typos lurking in your manuscript? Let us know what works for you in the comments below.

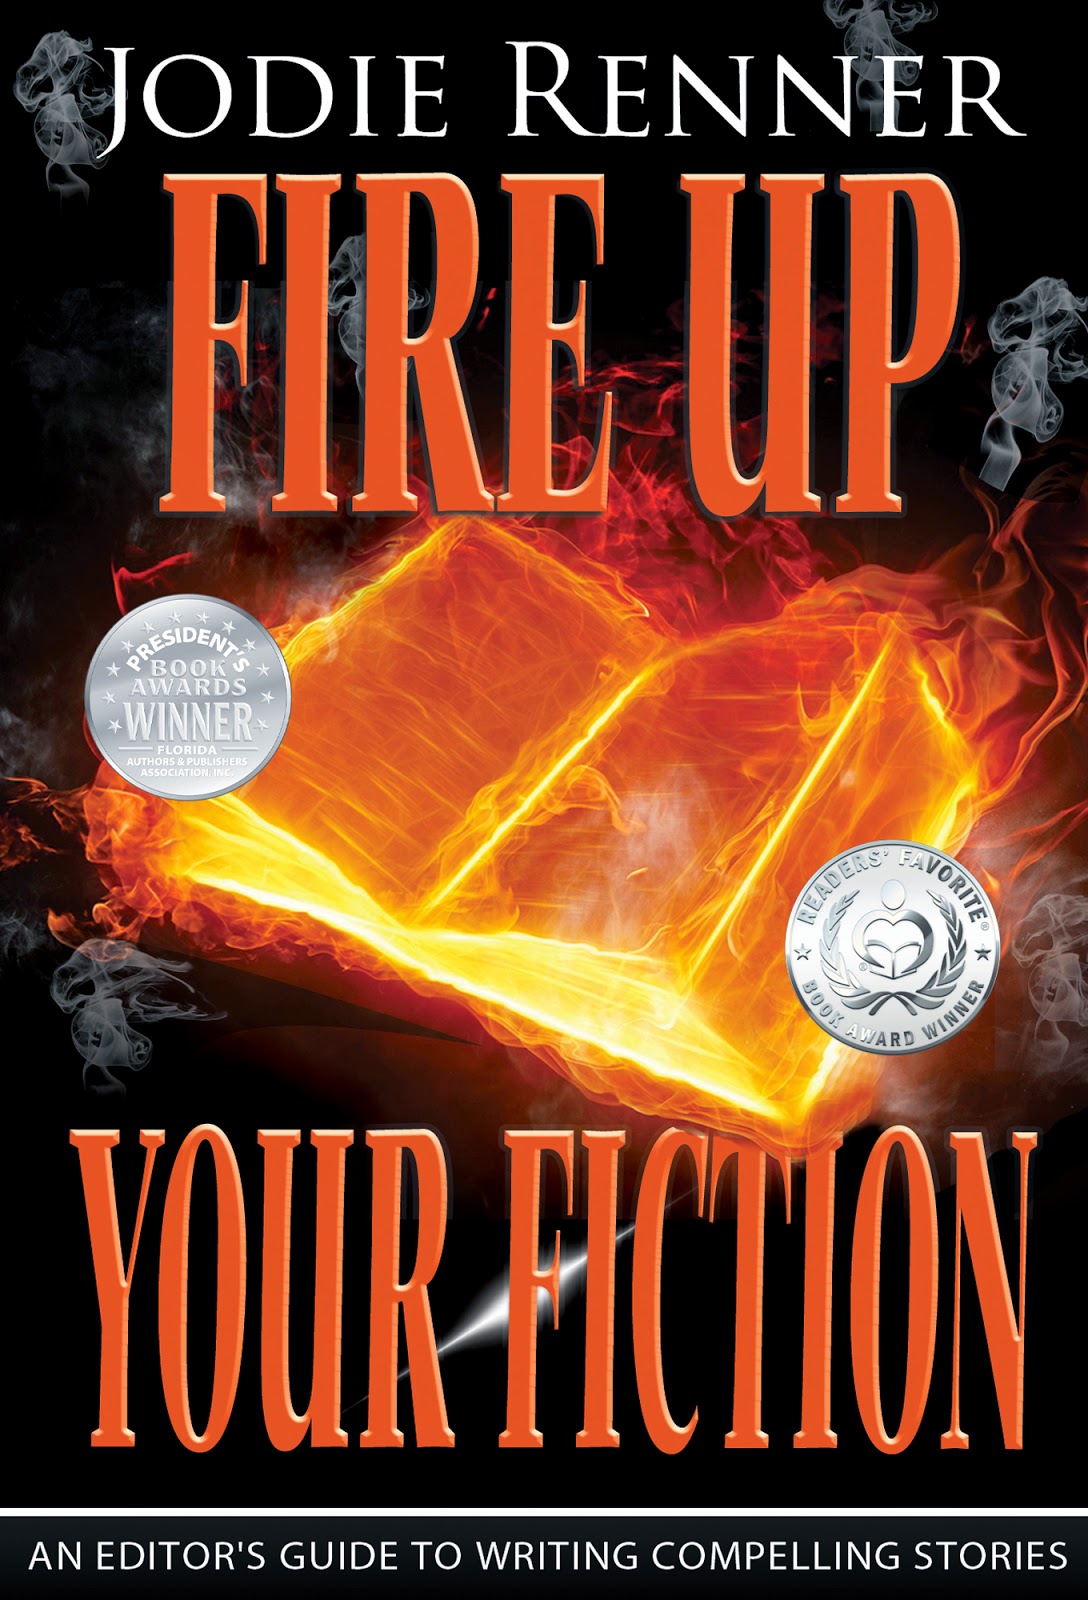
Jodie Renner is a freelance fiction editor and the award-winning author of three craft-of-writing guides in her series An Editor’s Guide to Writing Compelling Fiction: FIRE UP YOUR FICTION, CAPTIVATE YOUR READERS, and WRITING A KILLER THRILLER, as well as two clickable time-saving e-resources, QUICK CLICKS: Spelling List and QUICK CLICKS: Word Usage. She has also organized two anthologies for charity: VOICES FROM THE VALLEYS – Stories and Poems about Life in BC’s Interior, and CHILDHOOD REGAINED – Stories of Hope for Asian Child Workers. Website: www.JodieRenner.com; blog: http://jodierennerediting.blogspot.com/; Facebook , Amazon Author Page.

Creating a Scene Outline for Your Novel

by Jodie Renner, editor & author

@JodieRennerEd

(This is a quick fill-in post for P.J. Parrish, who’s been hit by a flu bug. Get well soon, Kris!)

First, what’s a scene?

Although most novels are divided up into chapters, the scene is the fundamental unit of fiction. Each scene is a mini-story, with a main character, a problem or challenge, and a beginning, middle, and end of its own. Every scene needs tension or conflict, and at the end of each scene, at least one of the main characters must have gone through some sort of change. Otherwise, the scene isn’t pulling its weight and needs to be revised or cut. Every scene needs a mission (goal), an obstacle, and an outcome (usually a disaster). For more on scenes, see Jodie’s article “Every Scene Needs Conflict and a Change.”

A modern novel normally has several dozen scenes. Each scene can range in length from a few paragraphs to a dozen pages or more. A chapter can contain one scene or several. Some authors like to use jump cuts, where they “cut away” in the middle of a scene to go to a different scene, then perhaps interrupt that one in the middle to go back to the first scene and resume where they left off. In this case, a scene can span several chapters, often with other scenes interspersed.

Using the Scene Outline:

The outline below will help you organize your scenes and decide if any of them need to be moved, revised, amped up, or cut.

This is a great tool for both plotters and pantsers. Plotters/outliners can use it to outline your scenes early on in the process, and those of you who prefer to just let the words flow and write “by the seat of your pants” can use it later, to make sure the timeline makes sense and that the scene has conflict/tension and a change.

Keep each scene description to a minimum. Don’t get carried away with too many details, or the task could become arduous. The most important thing is the POV (point of view) character’s goal for that scene, and what’s preventing him/her from reaching that goal, plus any new conflicts / problems / questions that arise.

And you can use a different font color or highlight color for each main character, for a quick reference on who was the POV character for each scene. Also, you can print it up and cut them out to rearrange the scenes, or use a writing software for that.

If in doubt as to who should be the viewpoint character for that scene, most often it’s your protagonist. The point of view character can also, less often, be your antagonist or another main character. Almost never a minor character. If you can’t decide who should be the POV character for a particular scene, go with the character who has the most invested emotionally or the most to lose.

SCENE OUTLINE FORM:

Scene 1: Chapter:1 Place:

Date/Month/Season: Year (approx.):

POV character for this scene:

Other main characters here:

POV character’s goal here:

Motivation for their goal (why do they want that?):

Main problem / conflict – Who/What is preventing POV character from reaching his/her goal:

Outcome – Usually a setback / new problem:

(And/or new info, revelation, new question, or, rarely, the resolution of the problem):

Scene 2: Chapter: Place:

Date/Month/Season: Year (approx.):
    

POV character:

Other main characters:

POV character’s goal:

Motivation for their goal:   

Main problem/conflict/question:

Outcome (most often a setback):

Scene 3: Chapter: Place:

Date/Month/Season: Year (approx.):

POV character:

Other main characters:

POV character’s goal:

Motivation:     

Main problem/conflict/question:

Outcome (most often a setback):

Scene 4:

Etc. Continue for as many scenes as you have.


Fiction writers – Do you have any tips to add to this scene outline?

Besides publishing numerous blog posts, her popular Editor’s Guides to Writing Compelling Fiction, the award-winning Fire up Your Fiction and Writing a Killer Thriller and her upcoming Captivate Your Readers, as well as her handy, clickable e-resources, Quick Clicks: Word Usage and Quick Clicks: Spelling List, Jodie Renner is a freelance fiction editor. Find Jodie on Facebookand Twitter, and sign up for her occasional newsletter here. Author website: JodieRenner.com.

12 Essential Steps from Story Idea to Publish-Ready Novel

 Jodie Renner, editor & author @JodieRennerEd

If you want your novel, novella, or short story to intrigue readers and garner great reviews, use these 12 steps to guide you along at each phase of the process:

1. Brainstorm possibilities – or just start writing. Make a story map/diagram to decide who (protagonist, antagonist, supporting characters), what (main problem), where (physical setting), and when (past, present future, season). Or just start writing and see where it takes you — but be warned that this “pantser” method (writing by the seat of your pants) will require more editing, cutting, rearranging, revising, (and probably swearing, hair-pulling, and rewriting) later.

2. Write with wild abandon while your muse is flowing. Don’t stop to edit or rethink or revise anything. Just write, write, write! Don’t show it to anyone and don’t ask for advice. Just try to write uncensored until you get all or most of the first draft of your story down. If you get blocked or discouraged, put your writing aside for a bit and go to step 3.

3. Run out of steam? Take a break and hone your skills. Read some highly regarded, reader-friendly craft-of-writing books. Here’s a list of recommended resources for fiction writers. And maybe attend a few writing workshops or conferences (here’s a list of writers conferences in 2015), or join a critique group. Also, read blog posts on effective writing techniques. Check out our resource library here at The Kill Zone (down the right sidebar), as well as blogs like Writer Unboxed, Janice Hardy’s Fiction University (formerly The Other Side of the Story),  K. M. Weiland’s Helping Writers Become Authors, Angela Ackerman & Becca Puglisi’s Writers Helping Writers (formerly The Bookshelf Muse),  Elizabeth Craig’s Mystery Writing is Murder,  Joanna Penn’s The Creative Penn, John Yeoman’s The Wicked Writing Blog, and more. (Add your own suggestions in the comments below this post.)

Captivate_full_w_decal4. First revision. Go back to your story and look for possible ways to strengthen your characterization, plot, pacing, point of view, and narration, based on your reading of the various techniques that make up a bestselling novel today. Also, check for continuity, logistics, and time sequencing. Does your basic premise make sense? If the problem/dilemma your whole novel is based on is easily solved, you’ve got work to do! Go through the whole story and revise as you go. Always save the original copies, in case you want to go back and incorporate paragraphs or scenes from them.

5. Distance yourself. Put your story aside for a few weeks and concentrate on other things. Then you’ll have the distance to approach it with fresh eyes, as a reader.

6. Now go through it as a reader. Change the font and print it up. Or send it to your e-reader or tablet. Then be sure to read it in a different location from where you wrote it. With pen in hand, mark it all up.

7. Second revision. Now go back and make the changes you noted while reading.

8. Send it to beta readers, 3-6 volunteers — savvy, avid readers who enjoy your genre. Give them specific questions, like: Were you able to warm up with and start bonding with the main character early on? If not, why not? Do you think the writing style suits the genre? If not, why not? Are there areas where you were confused? What specifically confused you? Are there areas or details that didn’t make sense to you? Why not? Are there any points where your attention lagged, where you felt like putting the book down or skipping ahead?  Check out my list of 15 questions for your beta readers – and to focus your own revisions.

9. Third revision. Read through the feedback from your beta readers and strongly consider revising any parts that confused or bored them. Any areas of confusion or other issues mentioned by two or more of your readers should be red flags for you. Revise based on their suggestions.

10. Professional Edit. Now seek out a reputable freelance fiction editor who reads and edits your genre. Be sure to check over their website very carefully and contact some of the people listed as clients or under reviews or testimonials. And get a sample edit of at least 5 pages of your story – not someone else’s.

11. Final revisions based on the edit. Read your story out loud or use text-to-speech software to have it read aloud to you. This will help you pick up on any awkward phrasing or anywhere that the flow is less than smooth. If you bumble over a sentence or have to read it again, revise it for easier flow. (Do this at any stage of your story.)

Also, either before the professional edit or after, try changing the double-spacing to single-spacing and the size to 6” x 9” (e-reader size) and sending your story to your Kindle or other e-reader. Then read it on there, as a reader rather than a writer, but with a notebook beside you. See what jumps out at you that should be changed.

12. Get a final proofread of it, if you can afford this step, or perhaps you’ve made arrangements for your copyeditor to do another, final pass to go over your revisions, looking for any new errors that may have cropped up as a result of the revisions. (I edit in sections, and each section goes back and forth with the author at least 2 or 3 times.)

Now your story should be ready to send to agents and acquiring editors or to publish yourself. Good luck with it! Hope it enthralls readers and takes off running!

Do you have any essential steps to add or emphasize? What about more great blogs to help writers hone their skills? We always value your input!

Jodie Renner is a freelance fiction editor and the award-winning author of three craft-of-writing guides in her series An Editor’s Guide to Writing Compelling Fiction: Captivate Your Readers, Fire up Your Fiction, and Writing a Killer Thriller. She has also published two clickable time-saving e-resources to date: Quick Clicks: Spelling List and Quick Clicks: Word Usage. You can find Jodie at www.JodieRenner.com, www.JodieRennerEditing.com, her blog, http://jodierennerediting.blogspot.com/, and on Facebook, Twitter, and Google+.

15 questions for your beta readers – and to focus your own revisions

by Jodie Renner, editor & author; @JodieRennerEd


So you’ve completed the first draft of your novel? Congratulations! Now it’s time to start the all-important revision process. Be sure not to shoot yourself in the foot by sending it off or self-publishing it too soon. That’s the biggest mistake of unsuccessful novelists – being in too much of a hurry to get their book out, when it still needs (major or minor) revisions and final polishing.

To start, put it aside for a week or more, then change the font and print it up and read it in a different location, where you don’t write. Or, to save paper, put it on your tablet and take it outside to a park or a (different) coffee shop to read. That way, you can approach it with fresh eyes and a bit of distance, as a reader, rather than in too close as the writer. Using the questions below to guide you, go through the whole manuscript for big-picture issues: logistics, characterization, plot, writing style, flow. Try to put some tension on every page, even if it’s just minor internal disagreement. Remember that conflict and tension are what drive fiction forward. As you read, correct minor errors and typos that jump out at you and make notes in the margins and on the backs of the pages. Then go back to the computer and type in your changes.

Now it’s time to seek out about 3 to 6 avid readers to give you some feedback. It’s best not to ask your parent, child, significant other, sibling, or bff to do this “beta” reading, as they probably won’t want to tell you what they really think, for fear of jeopardizing your relationship. Or they may be so critical it actually will hurt your relationship! Your volunteer readers don’t need to be writers, but they should be smart, discerning readers who enjoy and read your genre, and are willing to give you honest feedback.

So how do you find your beta readers? Perhaps through a critique group, writing class, workshop, book club, writers’ organization, or online networking such as Facebook, Twitter, or Google+. In the case of a YA novel or children’s book, look around for be age-appropriate relatives, neighborhood kids, or the children of your friends – or perhaps you know a teacher or librarian who would be willing to read some or all of it aloud to students and collect feedback.

To avoid generic (and generally useless) responses like “I liked it,” “It was good,” or “It was okay,” it’s best to guide your readers with specific questions. Here’s a list to choose from, based on suggestions from novelists I know. If you’re hesitant to ask your volunteers so many questions, you could perhaps have them choose the ones that seem most relevant to your story and writing style. And of course, if you first use these questions as a guideline during your revisions, the responses from your beta readers should be much more positive, or of a nature to take your story and your skills up a level or two.

1. Did the story hold your interest from the very beginning? If not, why not?

2. Did you get oriented fairly quickly at the beginning as to whose story it is, and where and when it’s taking place? If not, why not?

3. Could you relate to the main character? Did you feel her/his pain or excitement?

4. Did the setting interest you, and did the descriptions seem vivid and real to you?

5. Was there a point at which you felt the story started to lag or you became less than excited about finding out what was going to happen next? Where, exactly?

6. Were there any parts that confused you? Or even frustrated or annoyed you? Which parts, and why?

7. Did you notice any discrepancies or inconsistencies in time sequences, places, character details, or other details?

8. Were the characters believable? Are there any characters you think could be made more interesting or more likeable?

9. Did you get confused about who’s who in the characters? Were there too many characters to keep track of? Too few? Are any of the names or characters too similar?

10. Did the dialogue keep your interest and sound natural to you? If not, whose dialogue did you think sounded artificial or not like that person would speak?

11. Did you feel there was too much description or exposition? Not enough? Maybe too much dialogue in parts?

12. Was there enough conflict, tension, and intrigue to keep your interest?

13. Was the ending satisfying? Believable?

14. Did you notice any obvious, repeating grammatical, spelling, punctuation or capitalization errors? Examples?

15. Do you think the writing style suits the genre? If not, why not?

And if you have eager readers or other writers in your genre who are willing to go the extra mile for you, you could add some of the more specific questions below. These are also good for critiquing a short story.

Captivate_full_w_decal– Which scenes/paragraphs/lines did you really like?

– Which parts did you dislike or not like as much, and why?

– Are there parts where you wanted to skip ahead or put the book down?

– Which parts resonated with you and/or moved you emotionally?

– Which parts should be condensed or even deleted?

– Which parts should be elaborated on or brought more to life?

– Are there any confusing parts? What confused you?

– Which characters did you really connect to?

– Which characters need more development or focus?

Once you’ve received feedback from all your beta readers, it’s time to consider their comments carefully. Ignore any you really don’t agree with, but if two or more people say the same thing, be sure to seriously consider that comment or suggestion. Now go through and revise your story, based on the comments you felt were insightful and helpful.

What about you writers out there? Do you use beta readers? If so, how do you guide their reading? Do you have any questions or suggestions to add that have helped you focus their reading, so you can get a good handle on the strengths and weaknesses of your novel? And beta readers – do you have any questions you’d like authors to ask? I’d love to hear from all of you!

Also, see my post, “12 Essential Steps from Idea to Published Novel” here on TKZ.

And for a lengthy list of WRITERS’ CONFERENCES & BOOK FESTIVALS in North America in 2015, with links, click HERE.

 Jodie Renner is a freelance fiction editor and the award-winning author of three craft-of-writing guides in her series An Editor’s Guide to Writing Compelling Fiction: Captivate Your Readers, Fire up Your Fiction, and Writing a Killer Thriller. She has also published two clickable time-saving e-resources to date: Quick Clicks: Spelling List and Quick Clicks: Word Usage. You can find Jodie at www.JodieRenner.com, www.JodieRennerEditing.com, her blog, http://jodierennerediting.blogspot.com/, and on Facebook, Twitter, and Google+.

.


Indie Authors – Should You Revise & Republish Some of Your Earlier Books?

Jodie_June 26, '14_7371_low res_centredBy Jodie Renner, editor & author  @JodieRennerEd

I  often get contacted for editing by authors who have previously published a few novels, either on their own or through a small publisher with limited resources for editing. Their earlier works, while promising, were prematurely released and sales are slow, with few or mostly negative reviews.

These authors were often unaware at the time of any weaknesses in their books and just wanted to get them out there, perhaps on time for Christmas sales or for some other self-imposed time deadline. Many of these early works really needed an edit on some level: a major developmental edit for help with premise, plot, & structure; a content edit to address plot holes, inconsistencies, character motivations, point of view, etc.; a stylistic edit to address slow pacing, convoluted phrasing, too many author intrusions (backstory, info dumps, too much neutral description, telling instead of showing); or just a good clean-up of grammar and flow.

If those authors are serious about building a career as a respected novelist, leaving those books out there in the shape they’re in will only harm their reputation. And if they’re just out as eBooks on Amazon, it’s pretty easy to take them down and upload a revised, more polished version. I’ve done it several times with both of my books – quick and painless, really. Amazon doesn’t seem to care how many times I revise and re-upload the same title – I love the freedom! If you know basic formatting (here’s a how-to article on formatting your manuscript), you can make the changes pretty quickly and get the e-book back up.

Here’s an example of an email, typical of many I’ve received:

“Jodie, I have now read both of your books and your articles on point of view. Fantastic material. All of your comments and recommendations now make sense. With that foundation, I realize what an amateur job my first novel was. Maybe someday we can revisit and do major surgery or a lobotomy on [title of book].”

James Scott Bell has spoken here on TKZ about the need for “a long tail” – a backlist of other attractive titles by you that readers can choose from if they happen on one of your books for the first time and enjoy it. That’s the way to keep the royalties rolling in over the long term.

But of course this means all your titles need to be strong, of high quality. What if your earlier books are nowhere near the quality of recent ones? What if your worst, most amateurish production is the first one of your books someone reads? Do you think they’ll look for any more by you? Worse, they could write a nasty review saying they won’t waste their time with any more of your books. So you could also think of the “long tail” as a chain connecting readers to you. You don’t want any weak links to break that chain!

I’ve confidentially advised some authors, either my clients or not, to get one or more of their backlist titles cleaned up. Some agree and are grateful for the feedback, and others don’t seem to care, or even respond negatively. I don’t get that. If they’re getting bad reviews on Amazon for an early work and a professional editor suggests it would be a good idea to get it edited, why would they leave it up as it is? (And I’m not soliciting editing work here – I get way more requests for editing than I can handle.)

Some indie authors tell me they can’t afford to get their early books edited. I say you can’t afford not to, as those books are or could start dragging your reputation down and significantly reduce potential income. At the very least, If you’ve already (or since then) honed your fiction-writing skills by reading some great craft-of-writing books and/or attending writers’ workshops, here are three resources I recommend specifically for tips on revising fiction: James Scott Bell’s excellent Revision & Self-Editing, Elizabeth Lyon’s Manuscript Makeover, Jessica Page Morrell’s Thanks, But This Isn’t For Us, and my Style That Sizzles & Pacing for Power. All have very useful, concrete tips, with examples, for taking your fiction up a level or two and making your story more compelling. And if you’re struggling with making your first page zing, check out some of the great first-page critiques here on TKZ (links on side column). Then, after you’ve used the advice to revise your early book(s) yourself, be sure to follow it up with a low-cost or free final proofread for typos, grammar, and punctuation.

If the process of going back and revising a whole book feels overwhelming, here’s a great step-by-step plan of action for revision and self-editing. If you don’t have the time or inclination to do that right now, consider pulling any prematurely published early books out of circulation and resubmitting them later when you’ve had time to get them cleaned up or do it yourself. Don’t leave amateurish books out there where they can start collecting critical reviews and tarnish your name as a talented author. Or, if your muse just took a vacation on your WIP, take a break and use the time to revise an earlier novel.

Here’s what A.D. Starrling said in a recent comment (Oct. 22) here on TKZ:

“I have done a revised edition of Book 1 while simultaneously writing Book 3 (I know, one should really STOP rewriting once the darn thing is published, but the feedback for Book 2 was so good, I just had to bring Book 1 up to that level!).”

So my advice, as a freelance professional in the business of helping authors turn good stories into stellar ones that garner great reviews, is to take the time to make sure that at least the weakest links in the chain of your backlist are brought up to your current standards. Of course, I’m mainly talking about eBooks and self-published books here, which are so much easier to revise and republish.

Writers – what do you think? What if one of your early titles received a bunch of negative reviews on Amazon? Would you consider taking it down and revising it, then getting it edited by a professional, then republishing? Then you could always consider changing the title so you can lose the old, negative reviews.

What do the rest of you think of this?

See James Scott Bell’s excellent related post here on TKZ yesterday: Facing Down the Harsh Realities of Publishing.

Jodie Renner is a freelance fiction editor and the award-winning author of three craft-of-writing guides in her series An Editor’s Guide to Writing Compelling Fiction: Captivate Your Readers, Fire up Your Fiction, and Writing a Killer Thriller. She has also published two clickable time-saving e-resources to date: Quick Clicks: Spelling List and Quick Clicks: Word Usage. You can find Jodie at www.JodieRenner.com, www.JodieRennerEditing.com, her blog, http://jodierennerediting.blogspot.com/, and on Facebook, Twitter, and Google+.