By Debbie Burke
As authors, our “sit” muscles work overtime. No wonder they ache and cramp.
 When I start earning six figures from my novels, first thing I plan to do is hire a full-time massage therapist to undo the kinks in my body from writing.
Unfortunately…I foresee a long wait before that happens.
In the meantime, I found a helpful DIY tool to counteract “writer’s slump” caused by too much time sitting hunched over a computer.
The foam roller.
This device is inexpensive, has no moving parts, and doesn’t take up much space. By simply rolling on it, you can get a deep massage from the pressure of your body weight. Two doctors I talked to use a roller themselves.
Caution #1: consult your medical provider to be sure foam roller exercise is safe for your condition.
Caution #2: Do NOT use the roller directly on joints.
Caution #3: Using the foam roller requires getting down on the floor…then eventually getting back up again! Some of my parts are not original factory equipment, so exercises on the floor require planning.
Twice a week, I attend a foam roller class at the gym. Expert instructor Amy Lavin graciously agreed to demonstrate a few exercises.
Amy adds caution #4: Always remember to breathe.
Back Exercises:

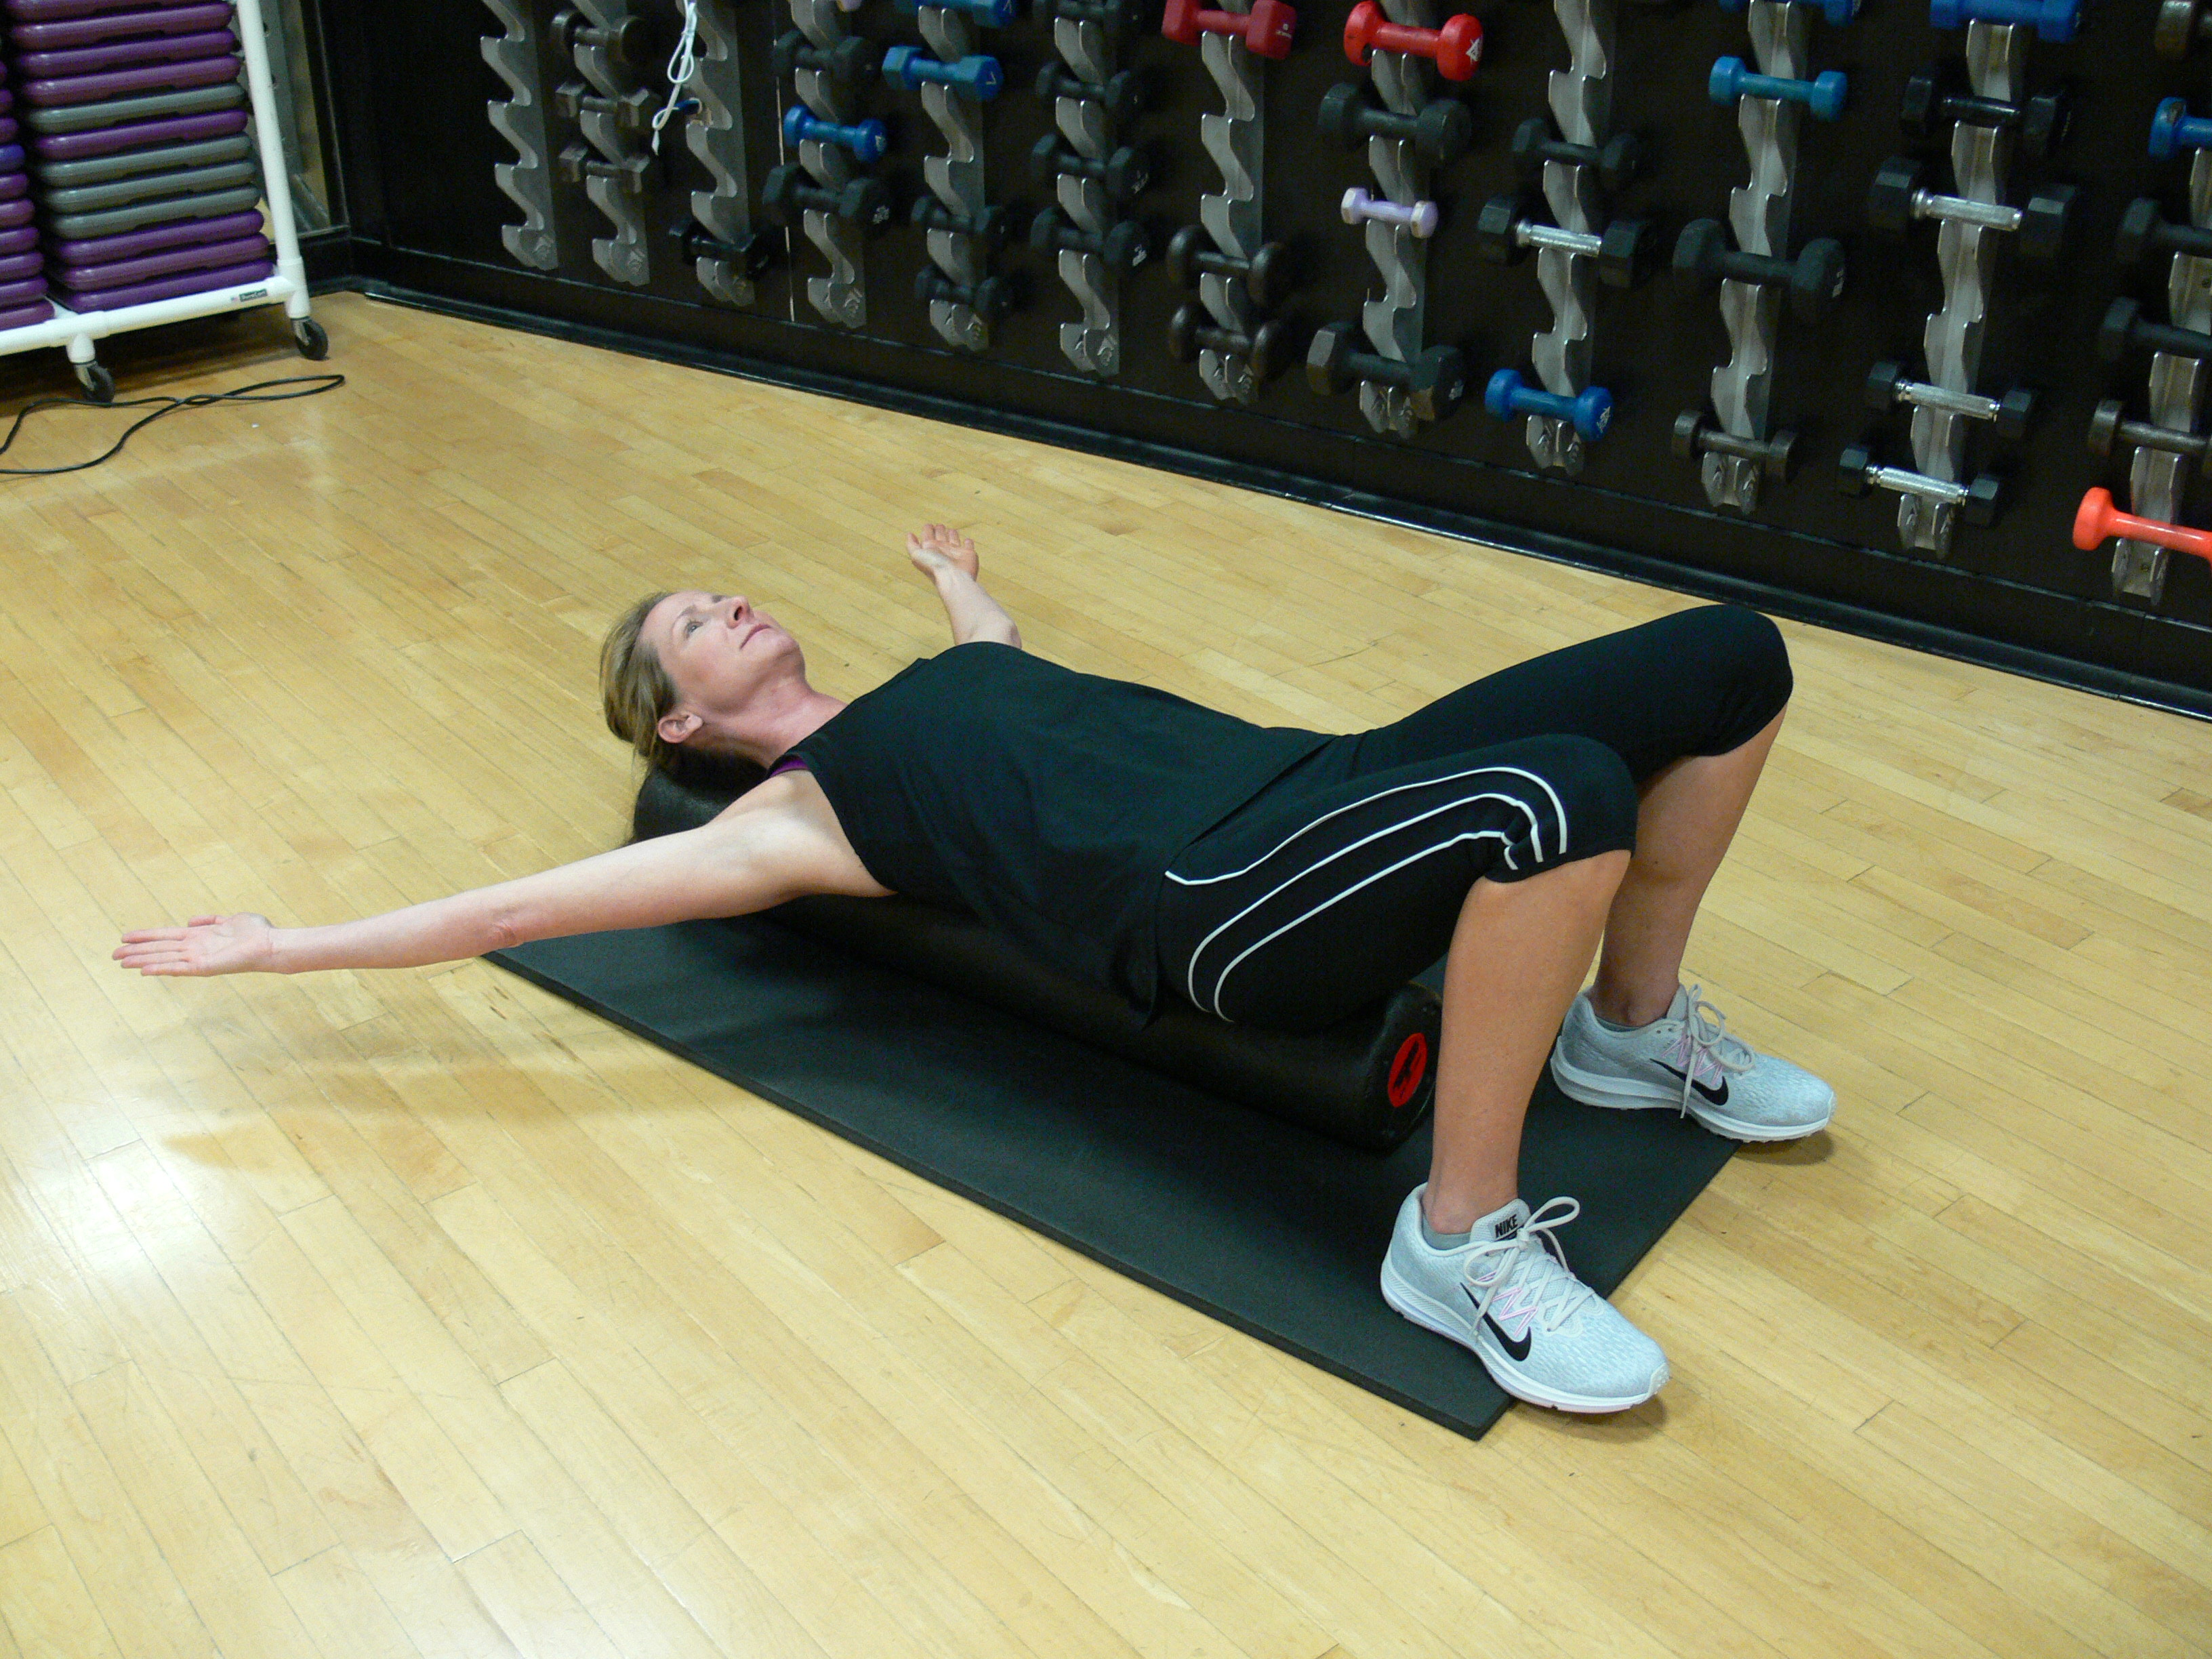
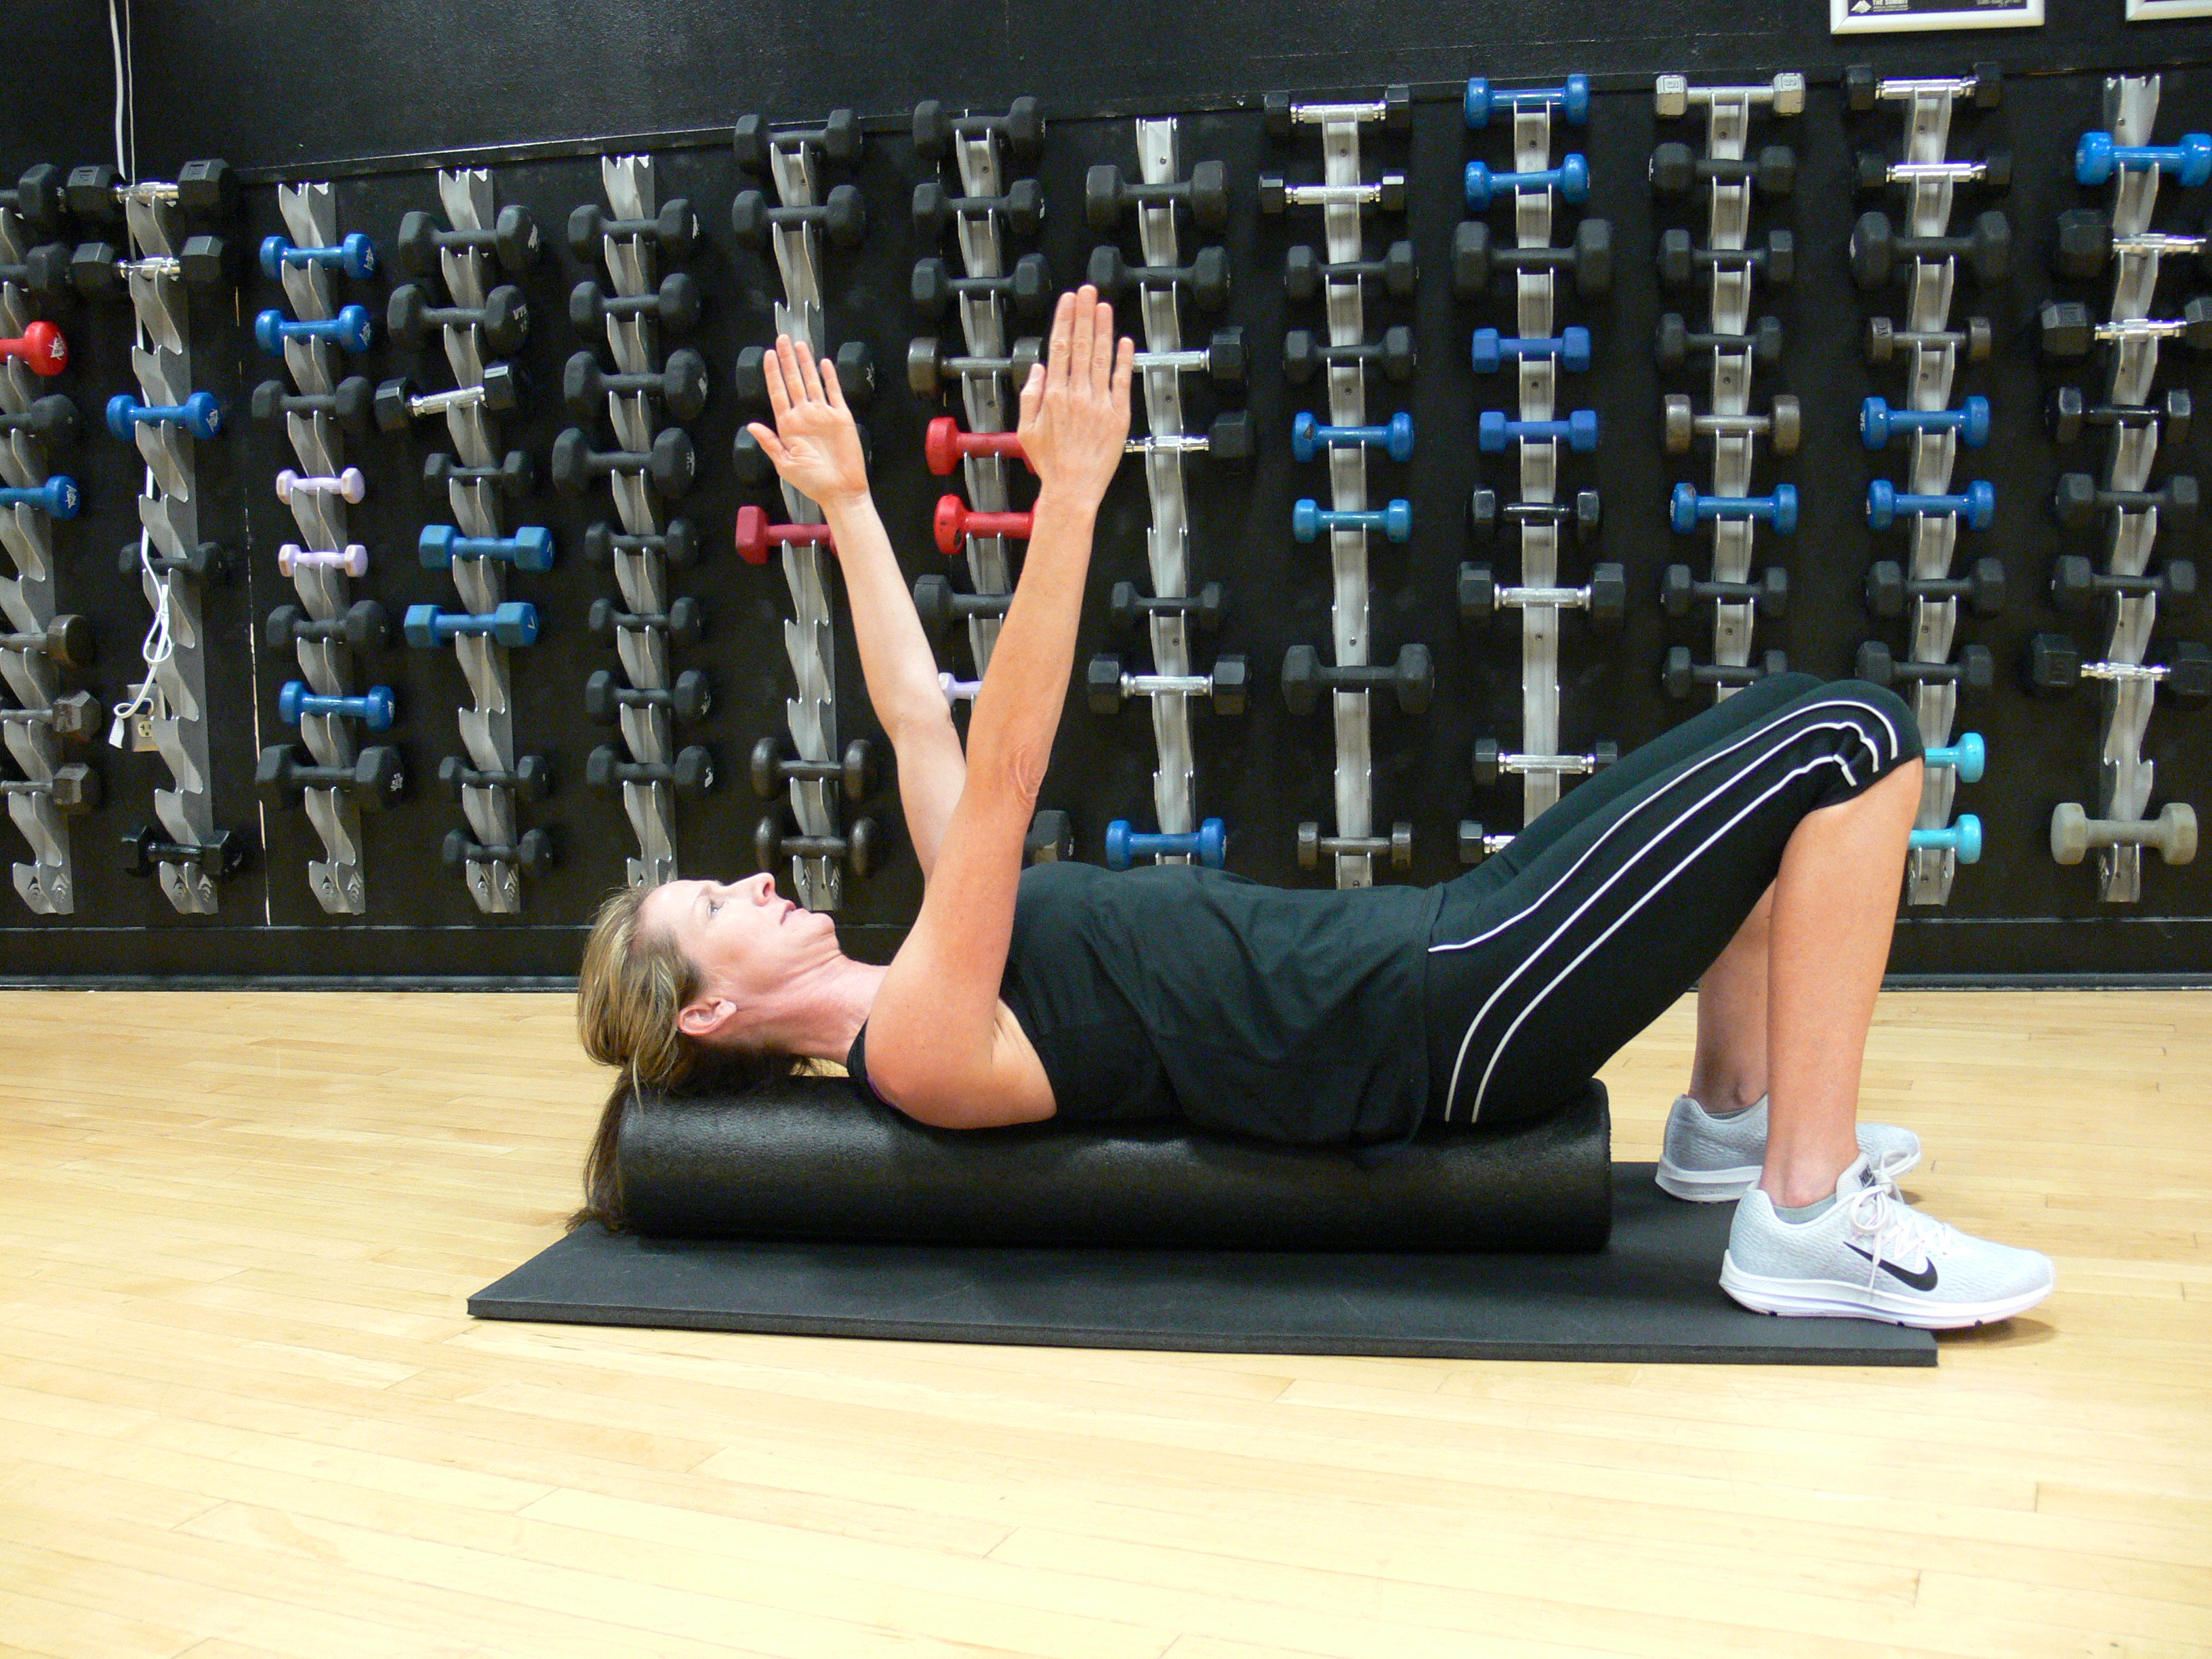
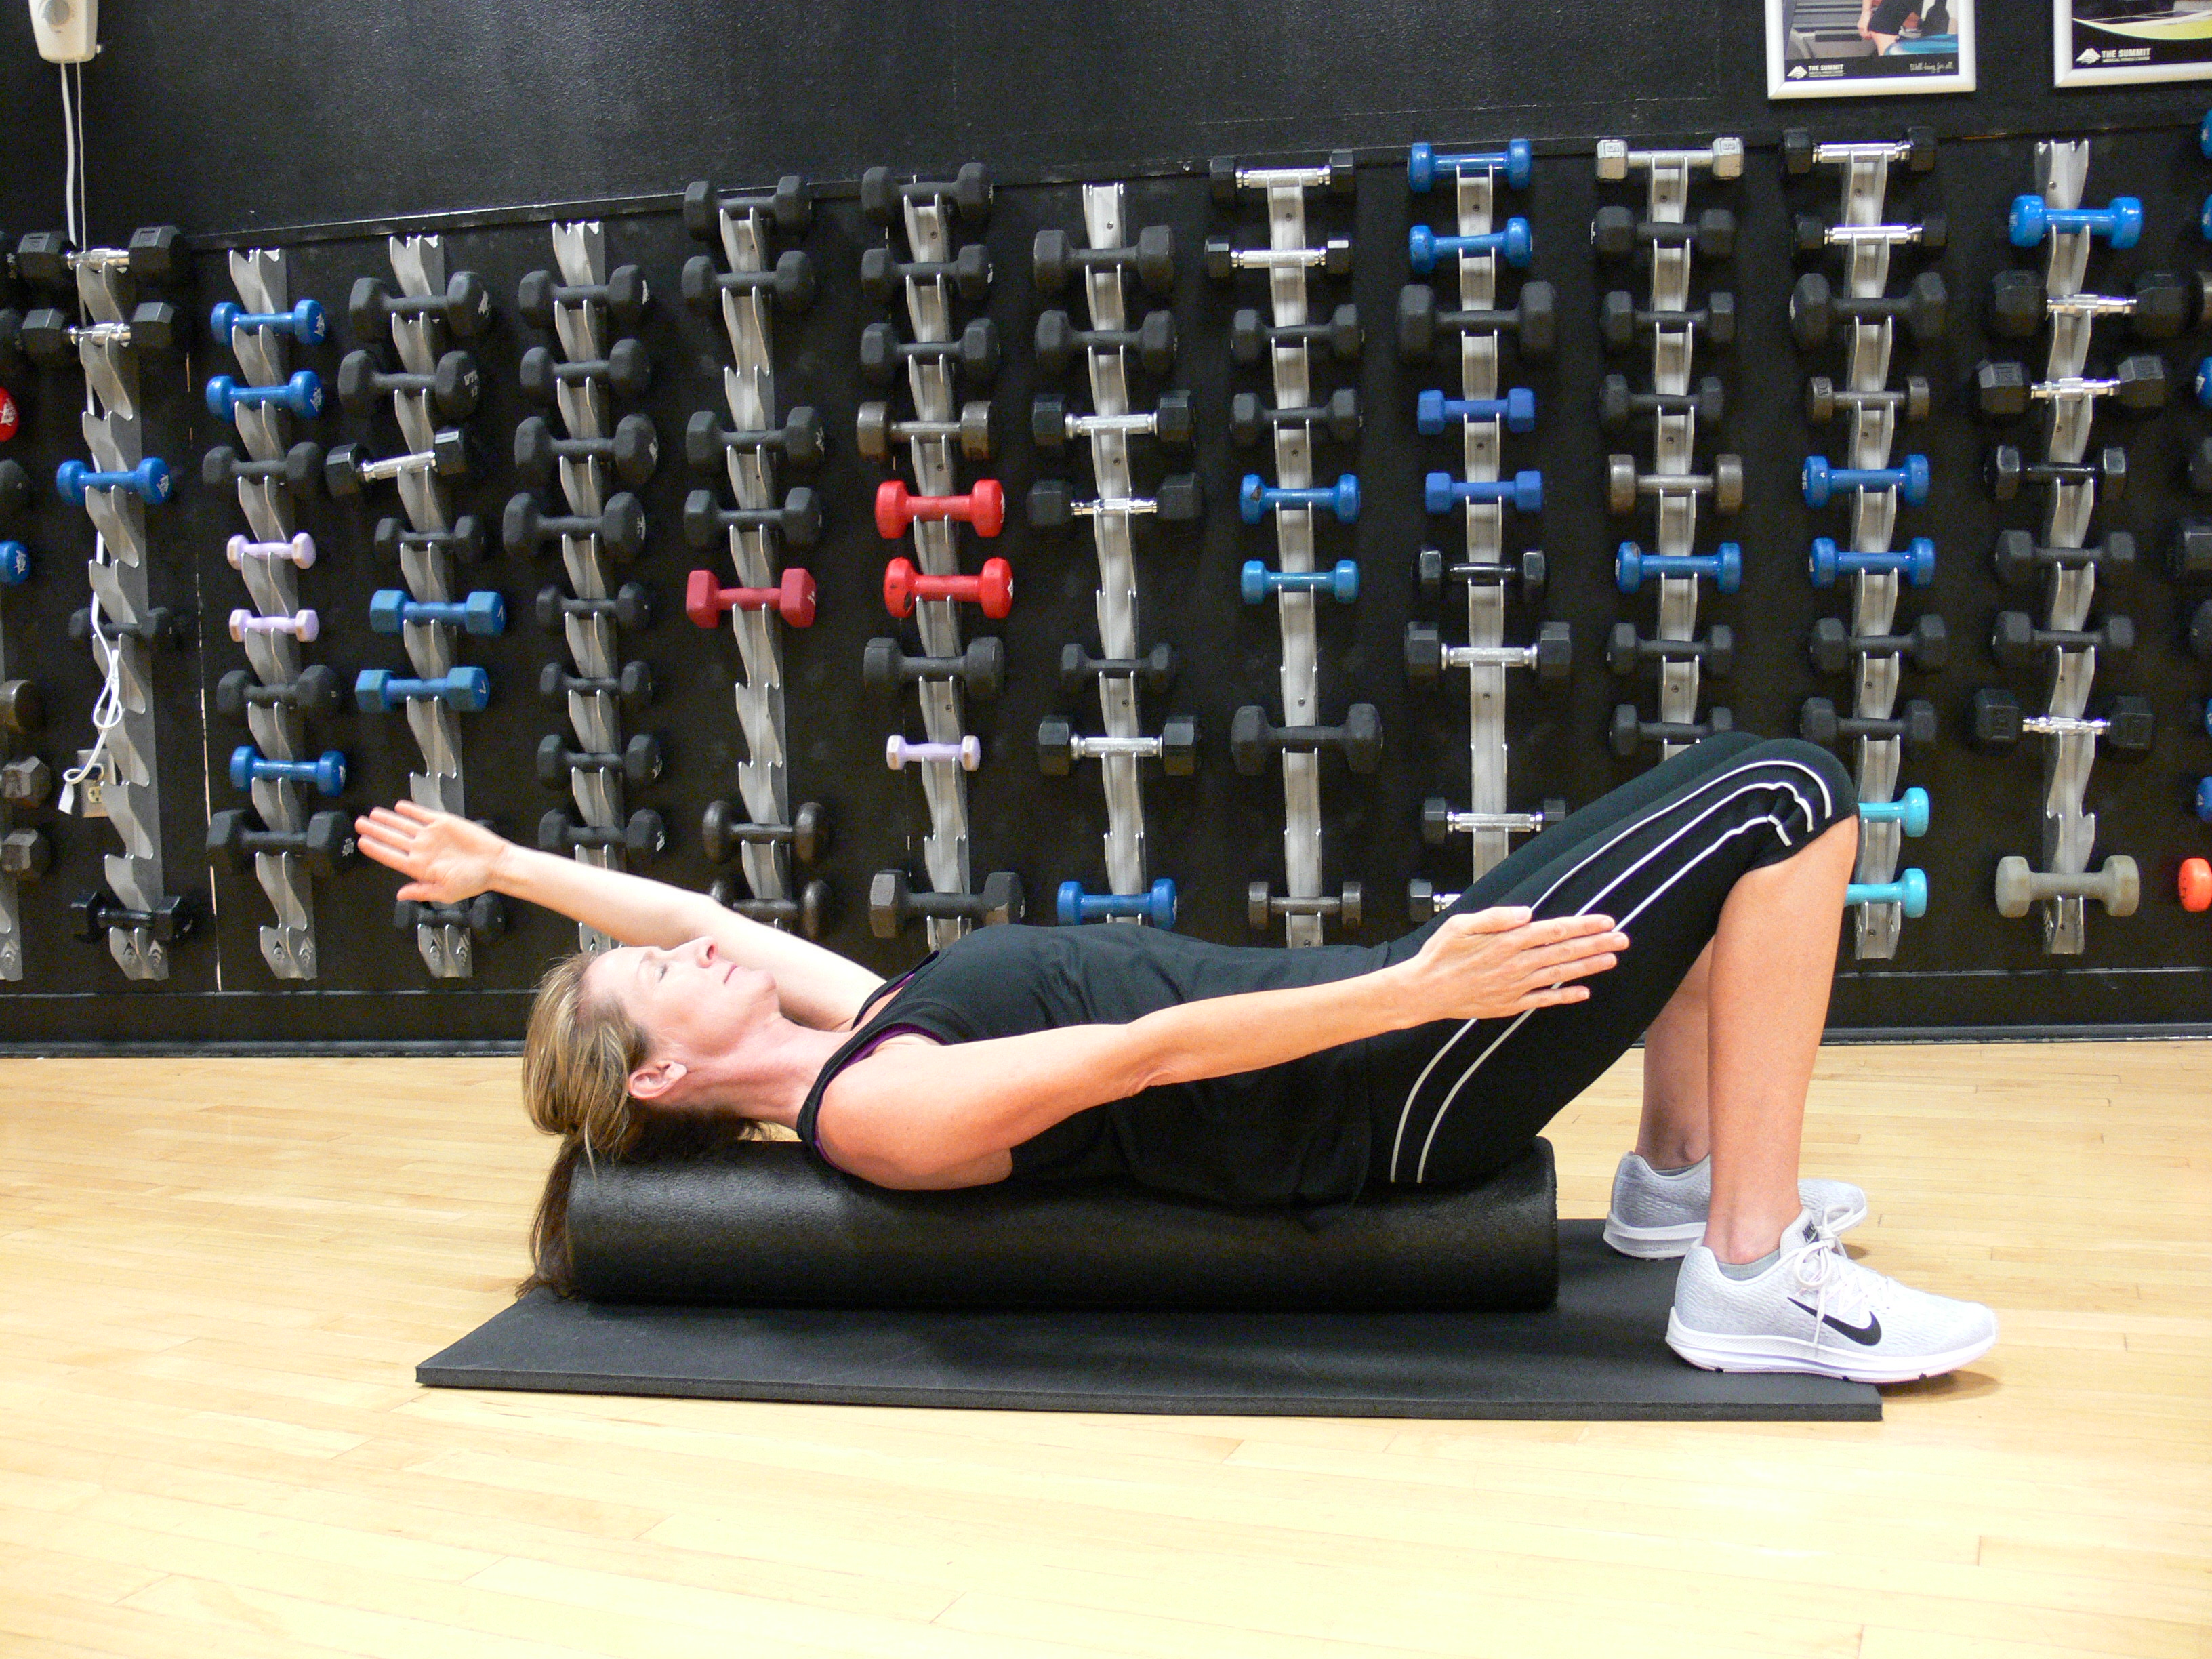
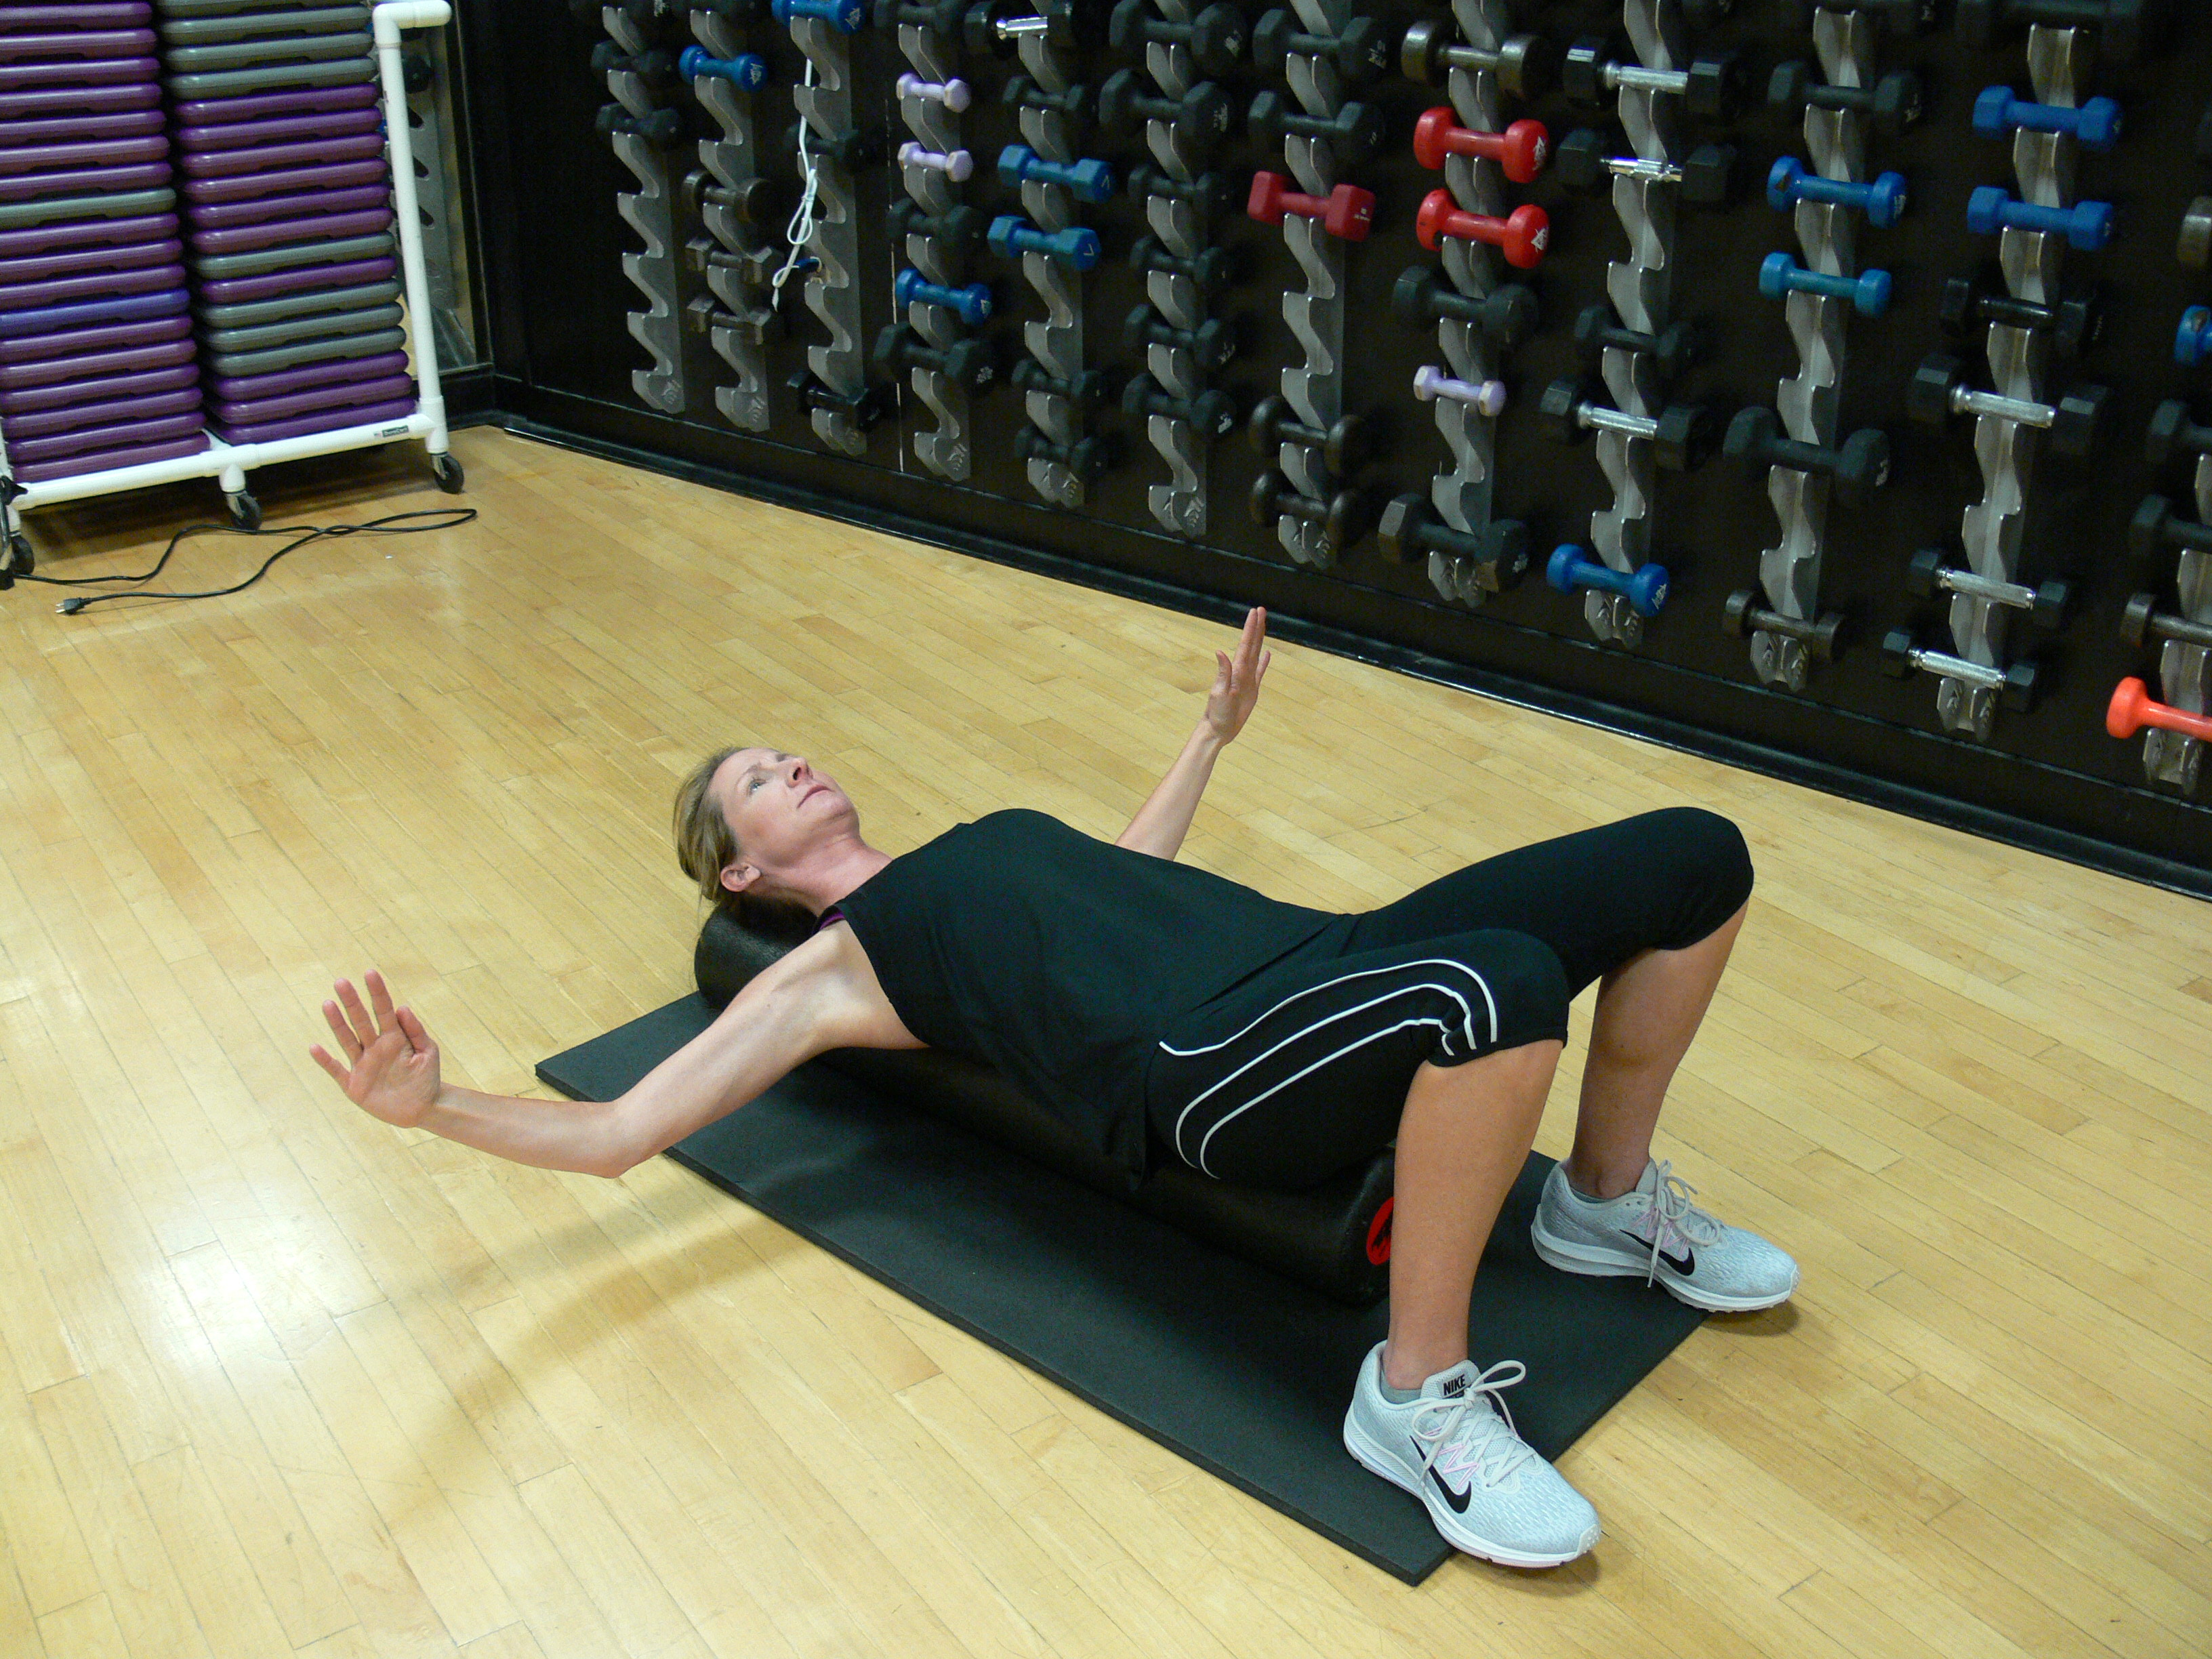
On a mat on the floor, lie lengthwise on the roller. Your head and the entire length of your spine rest on the roller. Let your arms relax at your sides. Gravity pulls your shoulders toward the floor. The stretch across your chest should feel good, not painful.
My doctor said simply lying in this position on the roller for 10 or 15 minutes every day is beneficial for the spine, even if you don’t go through the routine that follows.
- While lying lengthwise on the roller, gently roll back and forth a couple of inches on either side of your spine. Your core muscles tighten to maintain balance and keep you from falling off. Strengthening the core also helps support your back.
- Still lying lengthwise on the roller, extend your arms out from your sides, palms up, forming a T. Let your shoulder blades sink toward the floor to wrap around the roller, increasing the stretch through the chest. When you begin, your elbows may not be able to touch the floor. But, after several minutes, muscles should relax and allow your elbows to rest comfortably on the floor. This position also straightens posture.
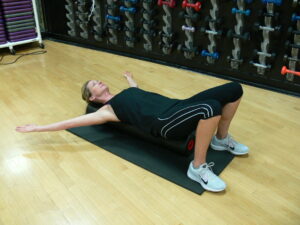 Raise your arms in a Y over your head. That lengthens the spine and increases the stretch for your back. Take several deep breaths.
- Slowly move your arms as if you’re making snow angels for several repetitions. Then reverse directions for more repetitions.
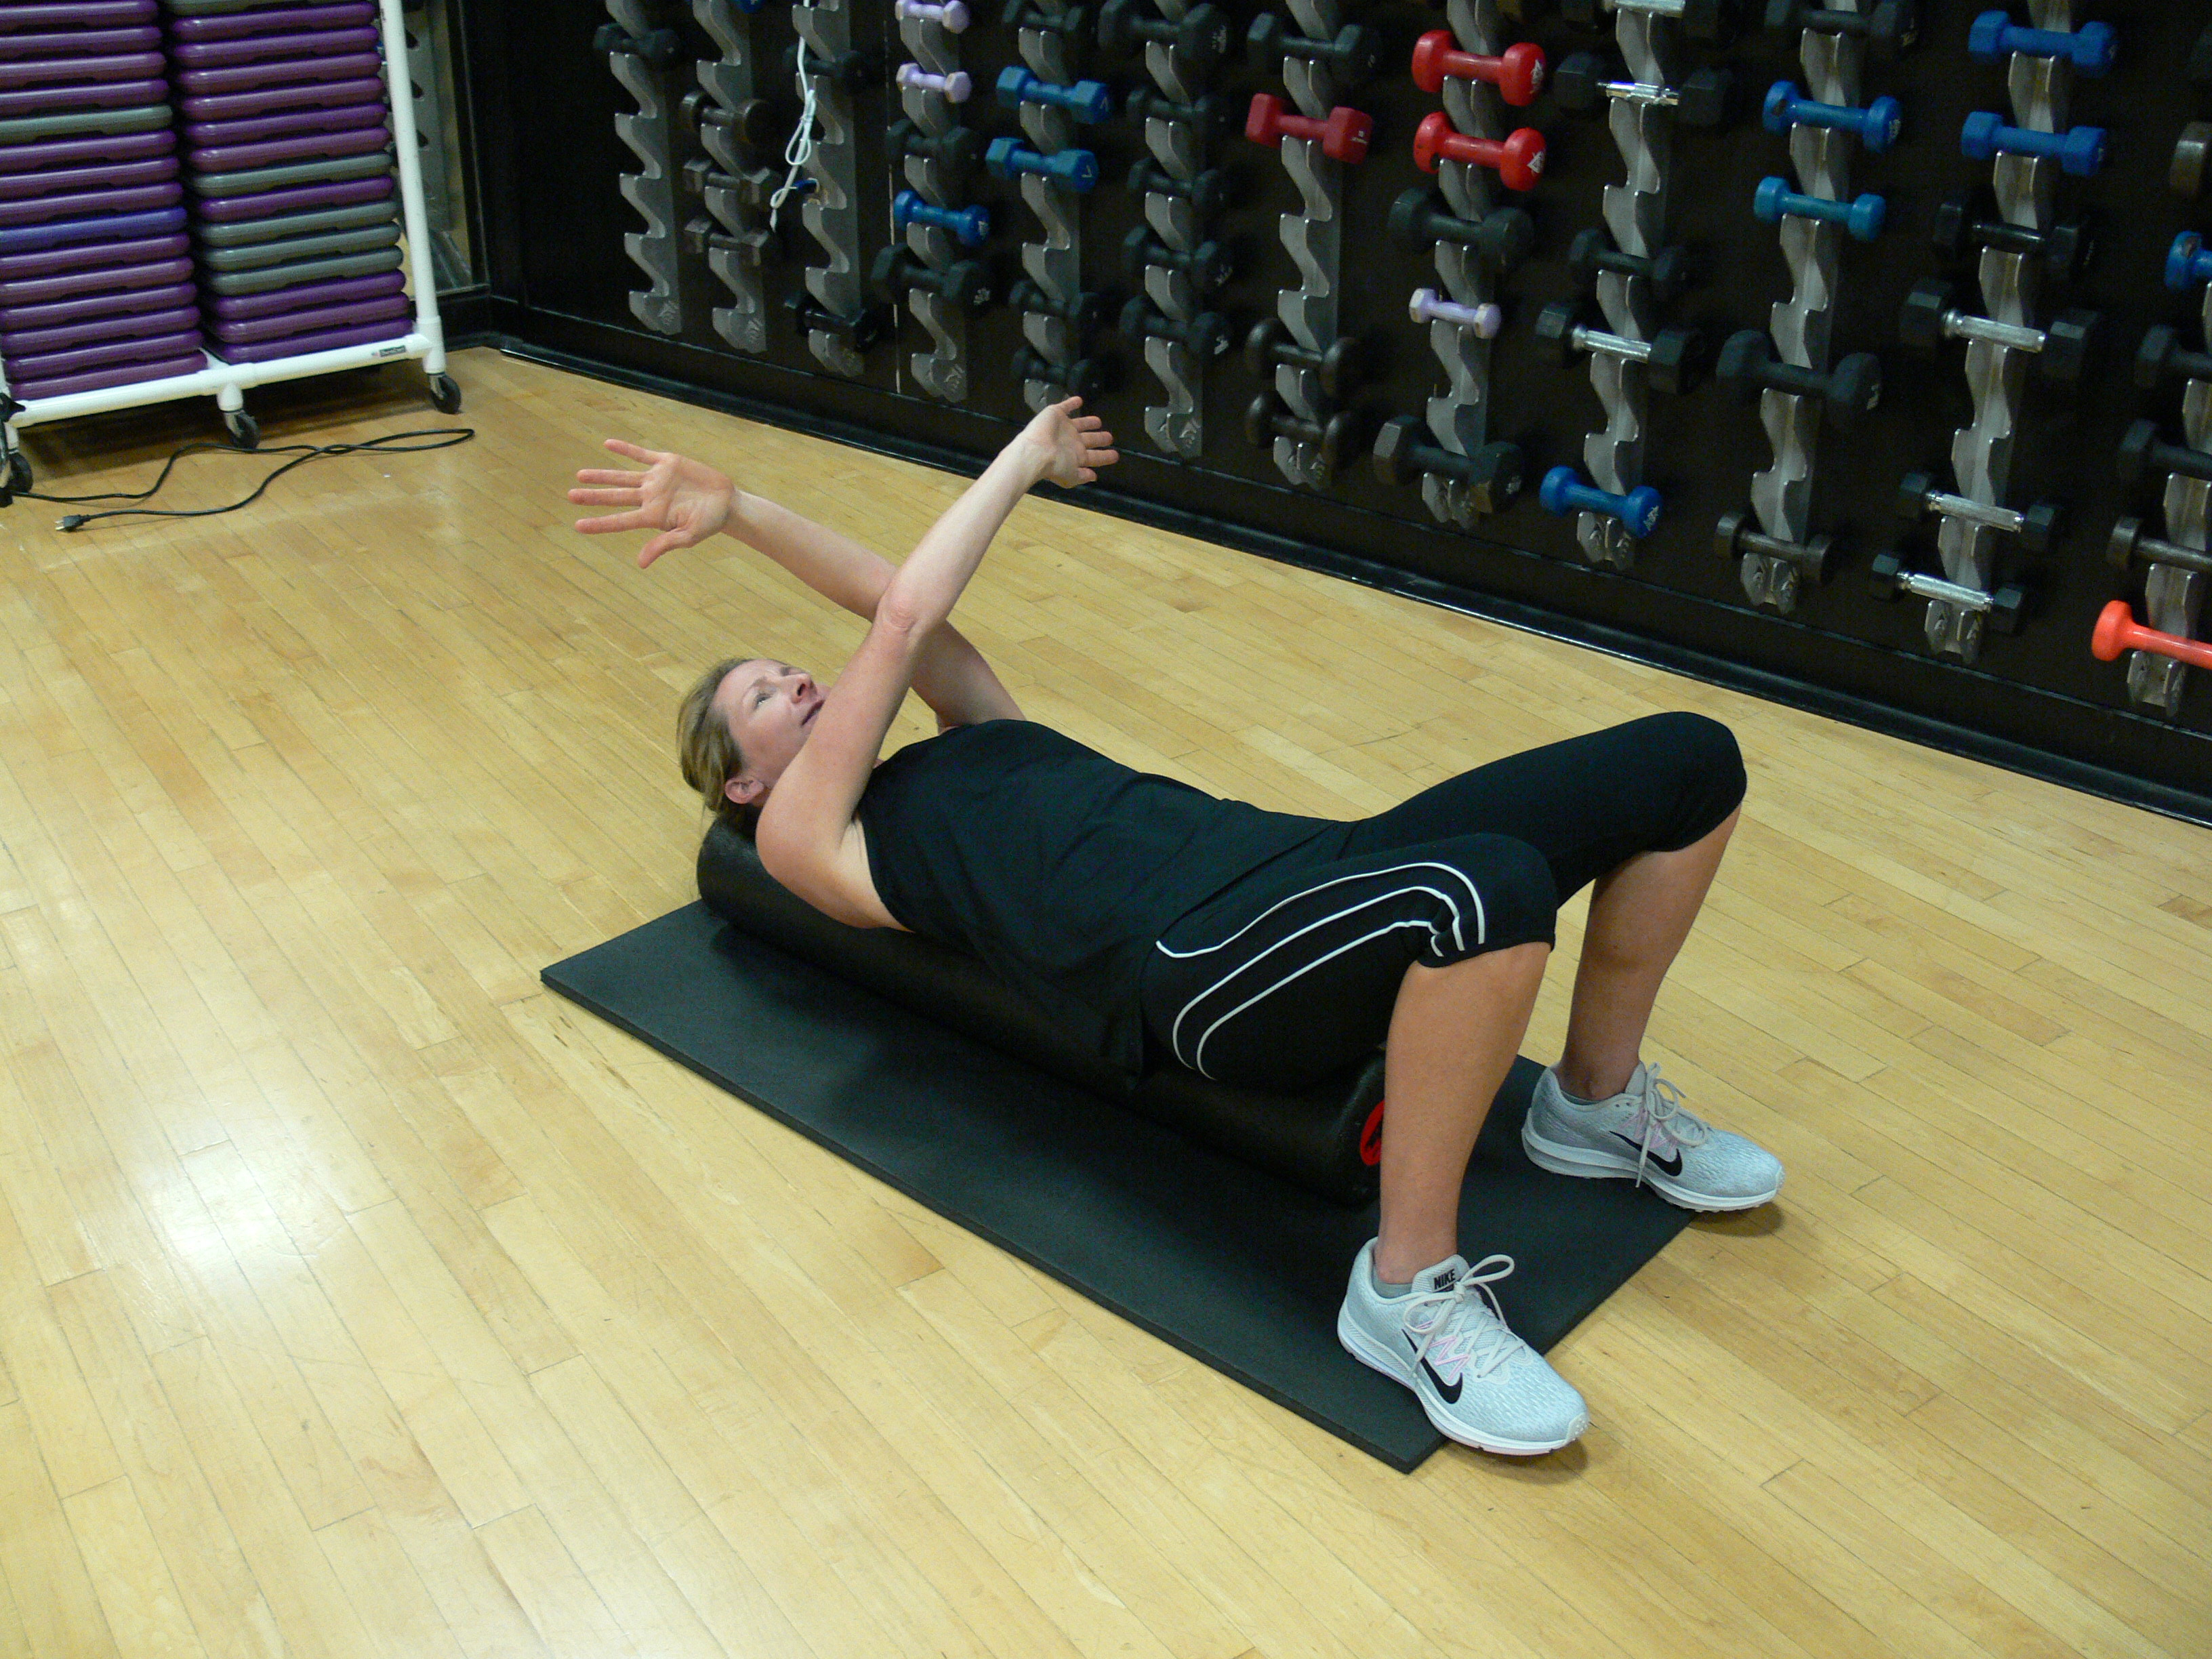
- Raise both arms straight up toward the ceiling. Move your arms back and forth in a scissors motion. One arm goes above your head, the other down to your side, then reverse. Repeat for a minute.
- Raise both arms above your chest and bend the elbows. Keeping the elbows bent, slowly lower the arms to the floor, rest for several beats, then raise arms so they crisscross over your chest. Continue raising and lowering the bent arms for at least a minute. When you begin this movement, your elbows may not be able to touch the floor but, as you repeat, muscles should loosen enough that your elbows can rest on the floor.

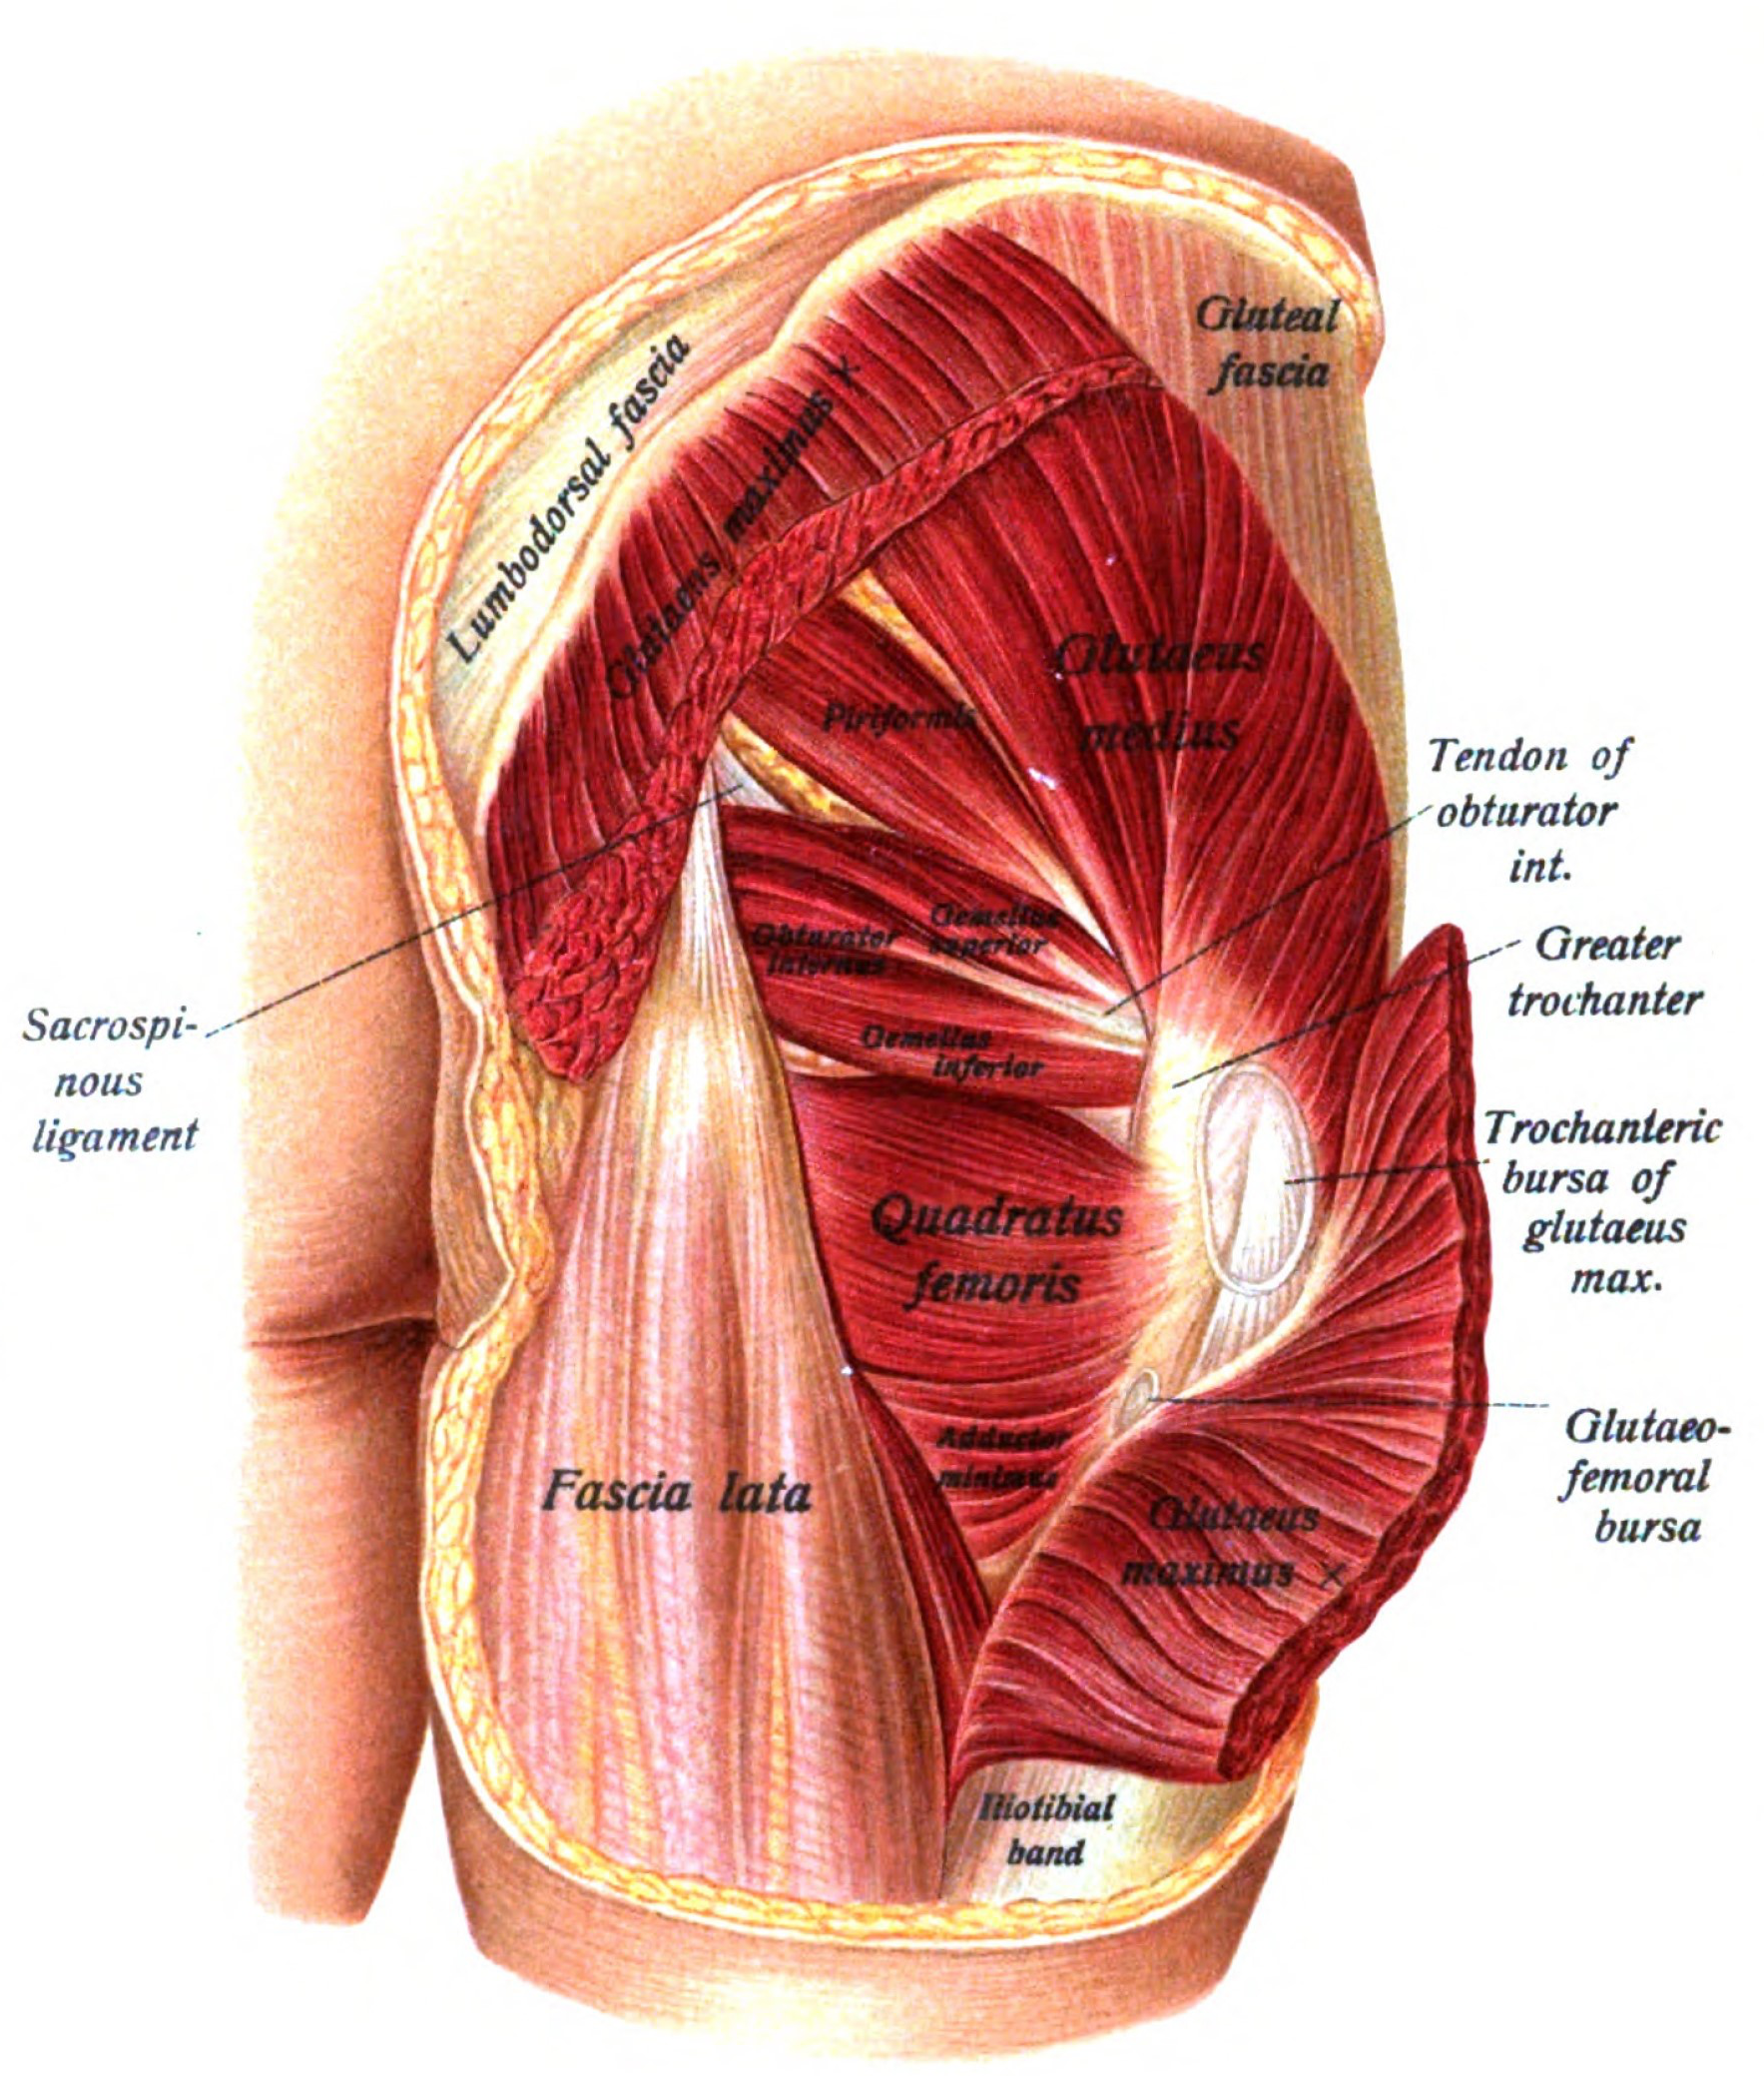
Exercises for “sit muscles”:
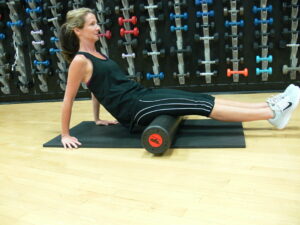
- Glutes: Sit on the roller and roll back and forth. The weight of your body presses the roller deep into your glutes. Roll on one cheek for a minute or more. Then switch to the other cheek. I find at times there is a hard knot like a round rock in the center of each cheek. Roll over that knot several times in a circular motion. Reverse and roll in the opposite direction.
 Hamstrings: Roll from the glutes down the backs of the thighs to the knees and back up. This massages the hamstrings. Repeat for 30 seconds to a minute.

- The iliotibial (IT) band is a tendon that runs down the side of the leg from hip to tibia. It can flare up from too much sitting.


Lie on your side, propping yourself up with one elbow. Position the roller horizontally under your hip. Slowly roll from hip down almost to the knee. Stop before the knee joint and do not roll on the joint. Roll up and down the side of your thigh for several minutes. Repeat on the opposite side.
When my IT band gets grumpy (which is often), this rolling may be painful. Be careful and stop if you feel it’s too much. Relief comes later.
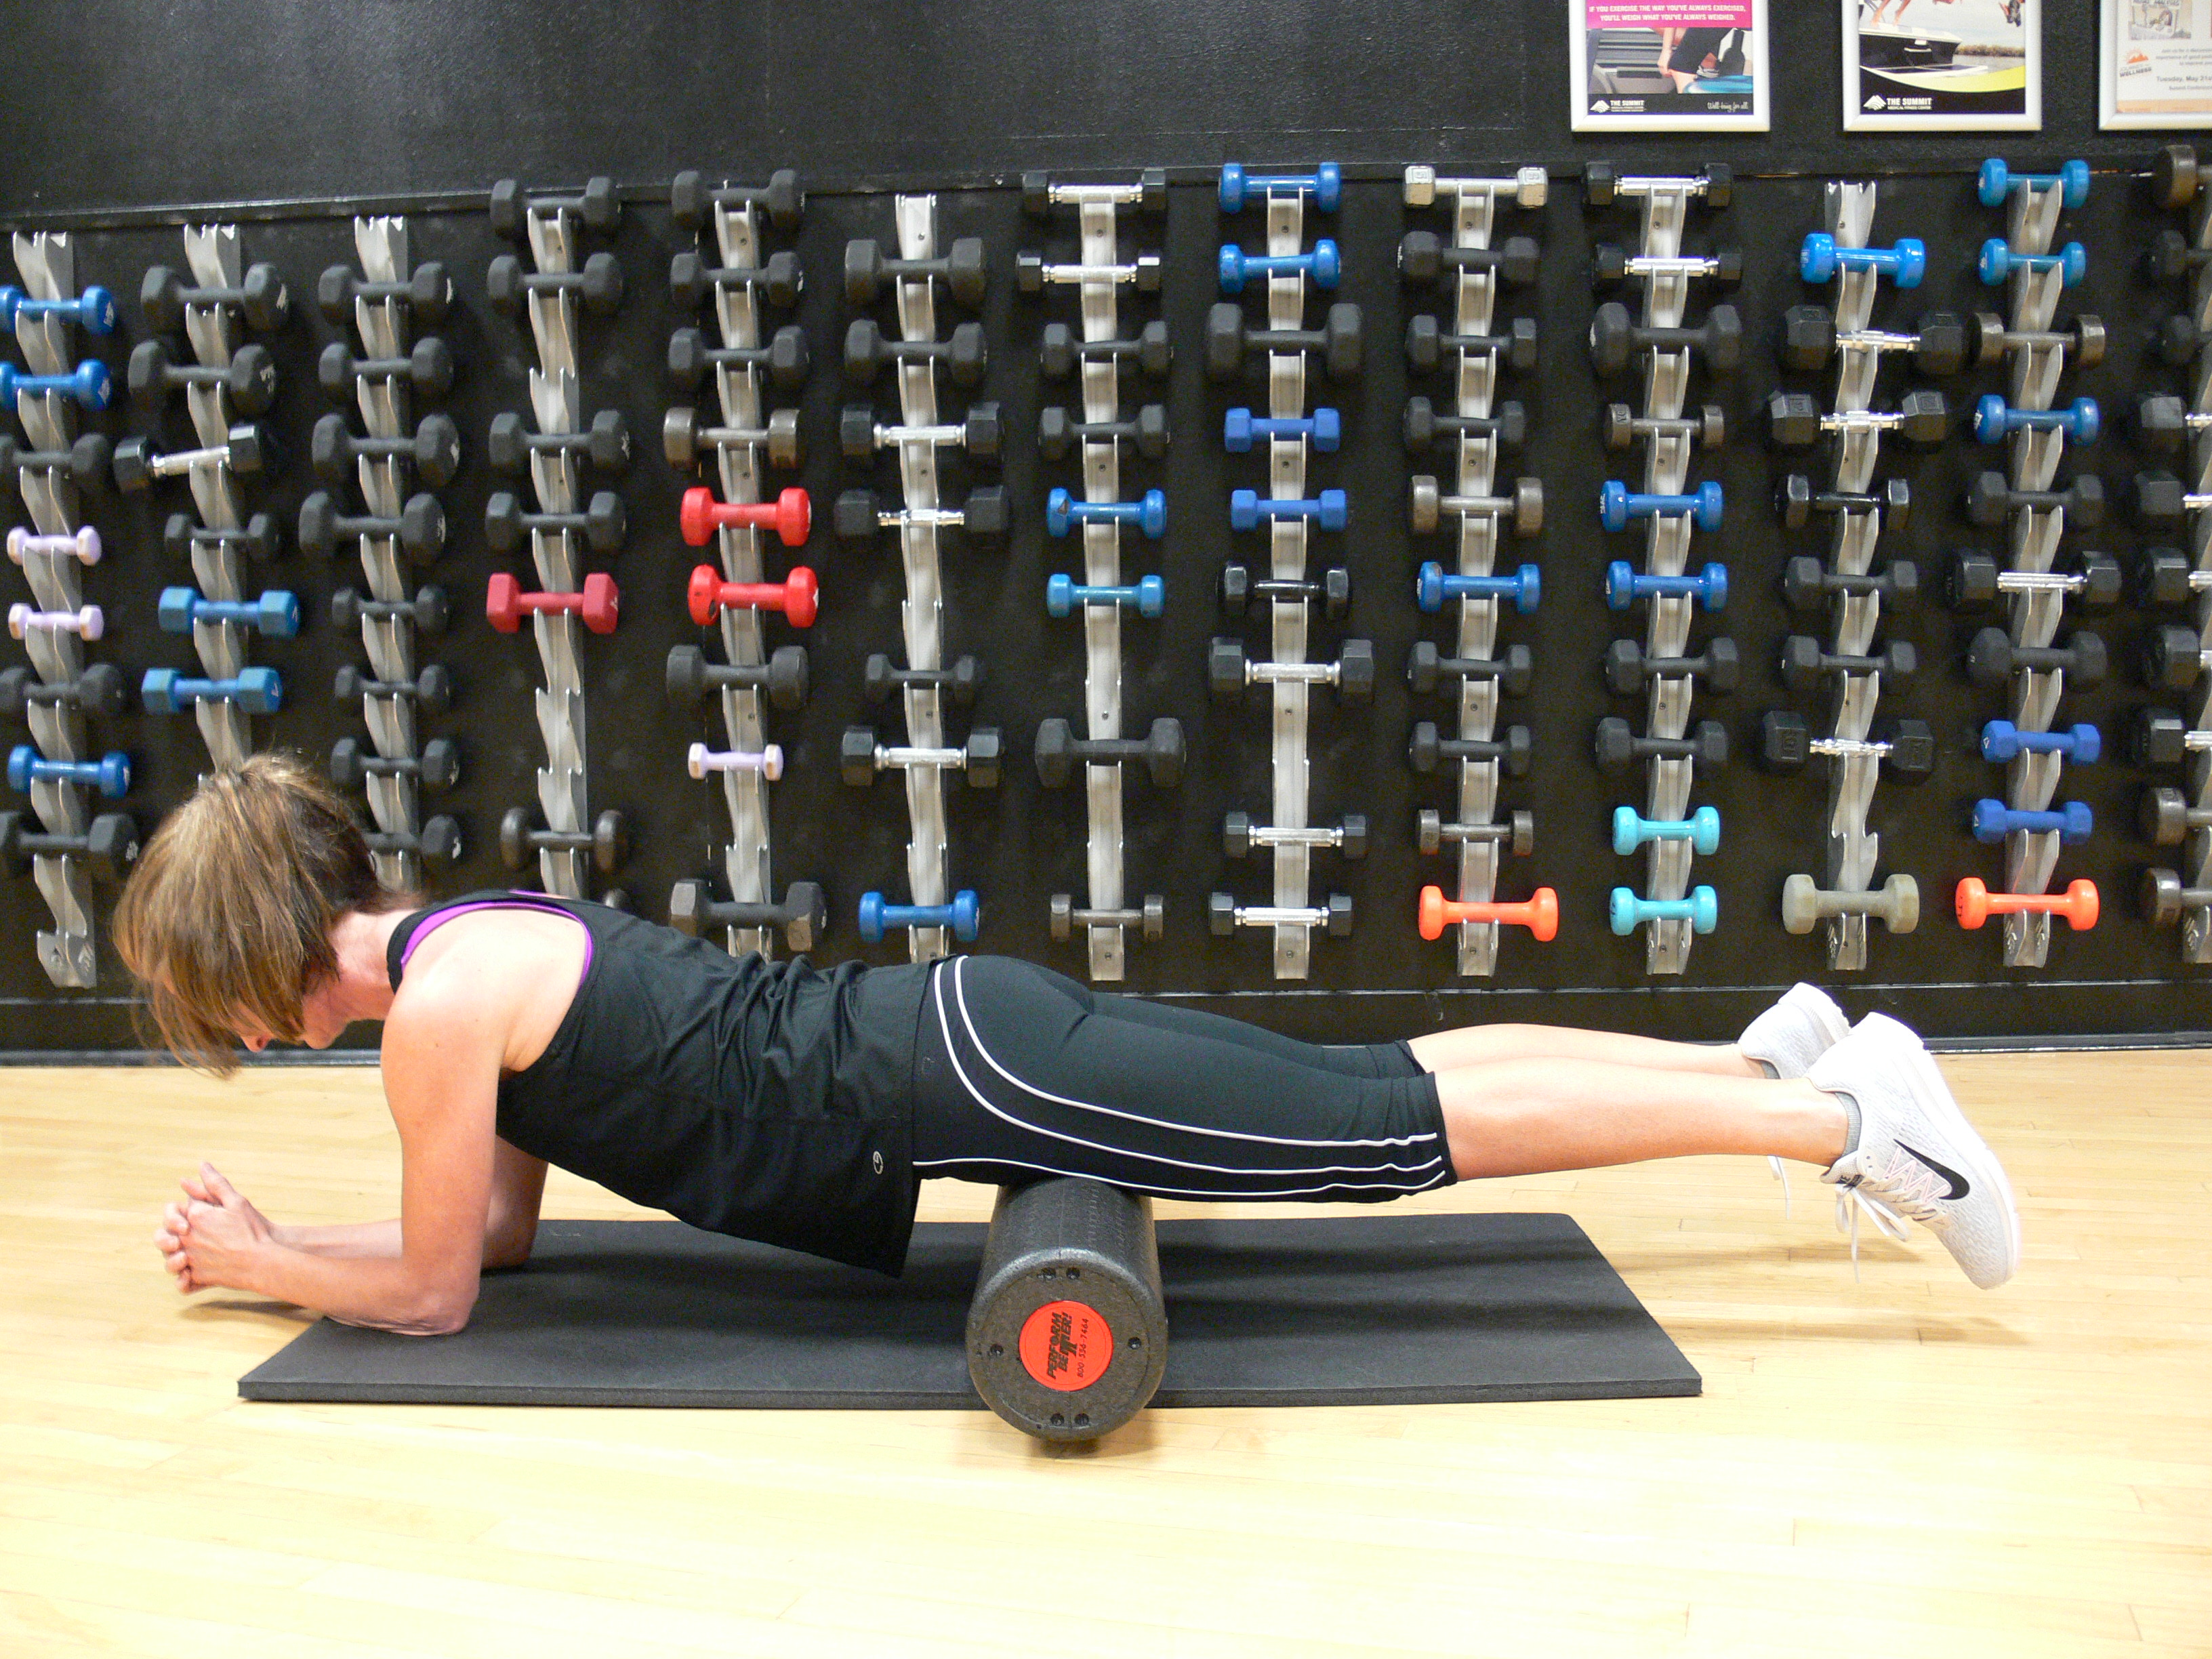
- Hip flexors: Lie on your stomach with the roller positioned under your hips. Shift your weight slightly to one side so the hip flexor (the crease between your thigh and pelvis) is on the roller. Roll back and forth over the hip flexor for 30 seconds to one minute. Switch to other hip and repeat.
 Quadriceps: Lie on your stomach and use your elbows to hold your chest off the mat. Position the roller horizontally under your quadriceps (fronts of your thighs). Roll up and down from top of thigh to just above the knee. Do not roll on the knee joint. Be careful—this pressure on your quads may be painful at first. As you repeat the exercise over time, the pain should lessen.
A big THANK YOU to Amy Lavin for demonstrating a DIY massage!
How about you, TKZers?
Have you tried a foam roller? Did it work for you?
Do you have a favorite exercise to help “writer’s slump”?