If you missed any parts of this newsletter series or need a refresher, find both here: Part I or Part II As I mentioned earlier, I use MailerLite. I made the switch from MailChimp, and have never looked back. So, these instructions and screenshots may look a little different on your dashboard if you use a different provider, but it should be similar enough to get you started. Today’s post forced me to re-evaluate how I welcome new subscribers. Hopefully, it’ll do the same for you.
On your dashboard, go to Automation. Then click “Create Workflow.” That’s what MailerLite calls a welcome or onboarding sequence.
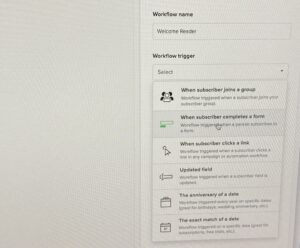
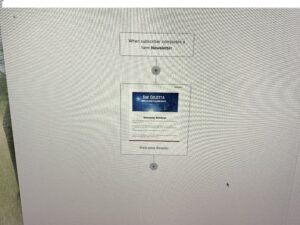
The first thing we do is pick a trigger. For a welcome sequence choose “When someone subscribes to a form.” It’ll then ask which form, and you’ll choose your Newsletter form from the dropdown menu.
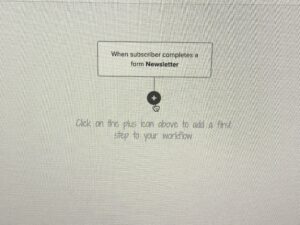
This window shows the trigger once we have it in place.
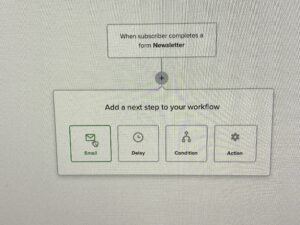
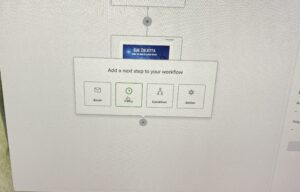
If you click the + you’ll see four options, all of which we’ll use as we build the Workflow. For now, we want Email.
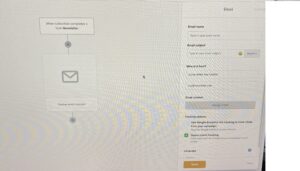
On the right-hand side (pictured below), you’ll see we can name our Workflow. So, for example, if you have a popup form and an embedded form, you may want to segregate who subscribed from where. Or if you have one form for blog subscribers and another for Newsletters. You can even segregate a separate Workflow for people who subscribed from social media. Conveniently, you can make a copy of the Workflow at the end, so you don’t need to build another one from scratch (unless you want to).
Next, you’ll dazzle subscribers with a subject line. Mine says: Welcome, Readers! Yeah, I really flexed the creative muscles for that one. LOL Then you’ll either create a welcome email or choose it from your list. Make sure you include a link to your free book (or whatever).
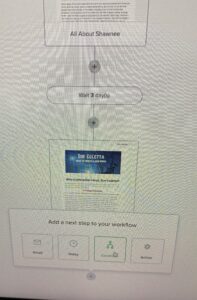
Once that’s done, your Workflow should look like this (below). The trigger at the top, then your welcome email.
After you send that initial email, you probably don’t want to slam them with your next email right away. So, when you click the + beneath the welcome email, choose delay.
On the right-hand side, you’ll choose how long of a delay before your next email goes out. I chose 3 days, but I know others who prefer 2 days.
Once your delay is in place, it’s time to create your next email. Now, as an author, it should probably be book-related. But you do you.
Since I want to push my Indie titles, I wrote an email entitled Welcome to the World of Shawnee Daniels (my main character). In which, I share two or three paragraphs about her early childhood, her fears, her goals, why she has trust and abandonment issues, and who she is today—all without spoiling the character arc of the series. It’s a tricky email for those with ongoing series, especially if they’re several books long. I bullet-pointed her life on scrap paper, and chose the most compelling elements to include. Whatever works for you and your series IS THE RIGHT WAY. I also include another link to my freebie in case they missed the Welcome Email.
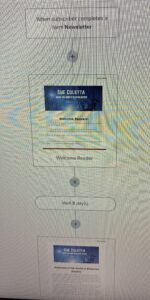
After we get our 2nd email in place, the Workflow will look like this…
Trigger
Welcome email
Delay
Character email
Can you guess what’s next? You got it. Another 2 or 3 day delay.
For the 3rd email, we need to show the reader who we are and why they’ll want to stick around. I shared ten truths about me. Now, you don’t have to be as transparent as me, but please don’t just slap down your bio and call it a day. Readers want to know the person behind the books they love. Do your best to show your humanity and character. Only then do I include a linked photo of my series with a Learn More button, but no hard sell.
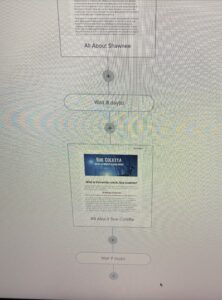
I think three emails are plenty, but again, you do you. Once all three emails are in place, the Workflow looks like this…
Trigger
Welcome Email
Delay
Character Email
Delay
All About Author Email
Now we need to decide what to do with that subscriber. Before we do anything, give them a chance to check their inbox by adding a 7 day delay.
After one week, we’ll want to know if they opened any or all of the three emails. If they didn’t, they may’ve just wanted your freebie. Here’s where things get tricky.
When we click the + this time, choose Condition.
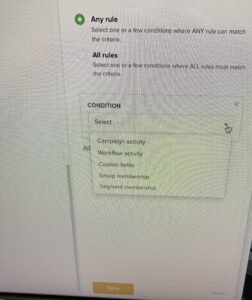
You can choose Any Rule or All Rules. For now, choose Any Rule. From the dropdown menu below, we want Workflow Activity. Then decide what condition you want to set. I chose Welcome, Character, and Author emails “was opened.” You need to set each condition separately, hence why it’s not “were opened.”
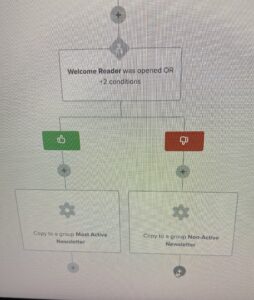
Once you set the conditions, the Workflow should look like this…
When you click the + this time, choose “Action” then “Workflow Activity” and set the parameters.
If it’s yes (green thumbs-up), “copy” that subscriber to a new list entitled “Active Newsletter Subscribers” or something equally telling, so you can target them in the future.
If the subscriber hasn’t opened any of your emails (red thumbs-down), you have a choice to make. Some authors “unsubscribe the subscriber” right there.
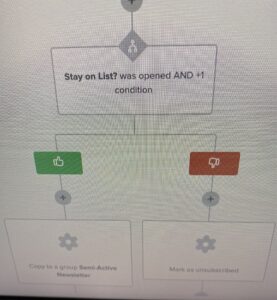
I think that’s a little harsh. After all, what if the metrics are wrong? Plus, we don’t know what’s going on in that subscriber’s life. So, I “copy to Non-Active Newsletter” and send one last email, entitled Stay on List? In which, I explain that email providers make mistakes and if they’re enjoying my emails to click the big button that says, “I’m happy.”
If they click that button (green thumbs-up), I “copy to Semi-Active Newsletter.” If they don’t (red thumbs-down), I unsubscribe. No sense paying for them if they’re not happy.
And that’s it. Toggle on your Workflow and you’re good to go.
For those who have an onboarding sequence set up, did I miss anything?
For those who don’t, I promise this isn’t as difficult as it seems. Once you start, these directions should take the guesswork out of it. How are you feeling about this? Any questions?
 Three unconventional eco-warriors are on a mission to save polar bears from the nation’s largest animal trafficking organization—one dead poacher at a time.
Releases June 26, 2023

