
James Scott Bell
@jamesscottbell
I got a comment in last week’s post wondering about the mighty program Scrivener, and speculating on how hard it might be to learn. So today I thought I’d give my overview for those who have been hesitant about taking the plunge.
Now, Scrivener does have a lot of “bells and whistles” that can, if taken in all at once, make someone think, “Sheesh! I can’t possibly learn all this!”
So … don’t take it all in at once! Scrivener is actually simple to use for many cool functions. Any other stuff can be learned at your leisure. (See the end of this post for my recommendation on that).
Here is how I advise approaching Scrivener:
1. Think of it as a binder
Many writers of the past used physical notebooks to house their drafts, notes, research and other items. I’m sure some still do. Well, Scrivener is a digital binder. Everything you generate can be stored here.
My binder always has my scene cards, the manuscript itself, character cards (with head shots), research, clippings (a cool feature is that you can highlight something on the internet and send that to a clippings file in Scrivener), and my novel journal.
All of this material is, of course, searchable.
2. Think of it as a corkboard
One of my favorite features in Scrivener is the corkboard. It’s just like the one in your office, with the push pins, only this one is virtual. I usually start my projects by thinking up random scenes, jotting notes on Scrivener’s “index cards” and “pinning” them on the corkboard. I can then move them around as I like. Below is a screen shot of a made-up project I created for a presentation:
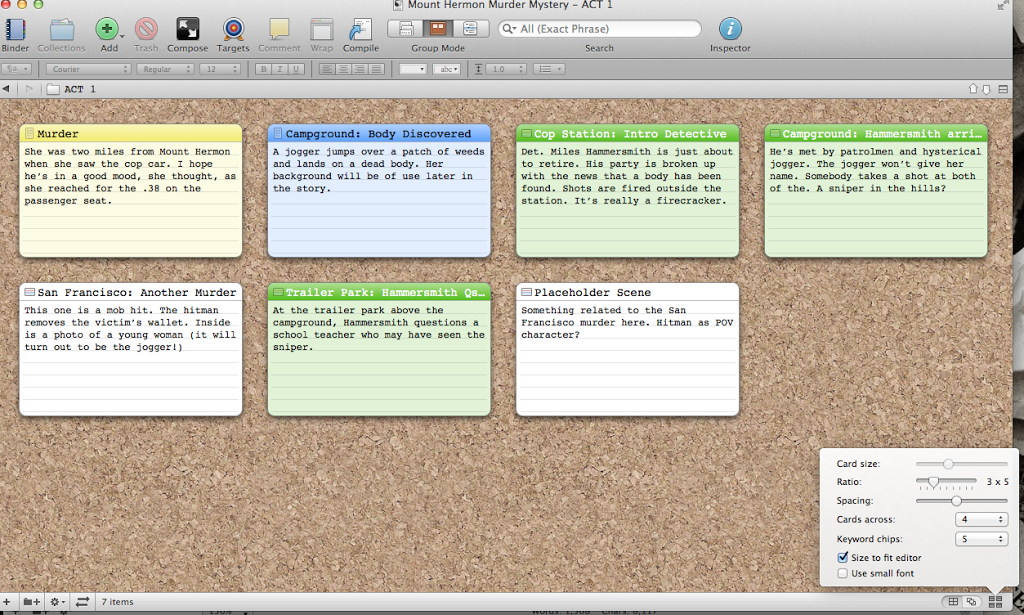
The jottings you see on the index cards are my synopses of the scenes. Later, if you wish, you can compile only these jottings and voila! You have a synopsis of the whole project.
You can drag a card to a different location and the order of the cards immediately adjusts.
On the bottom right corner is a box that lets you adjust the card size and how many cards across you want.
You can choose different colors for your cards. I choose colors by subplot. It makes it easy for me to see how the various strands in my story are shaping up.
3. Think of it as a creativity booster
Scrivener is extremely flexible, allowing you to shape it to fit your preferred working style. You can create your own templates, for example. I have one for my character work. It contains the key questions I ask about each main character. I can attach a head shot to each character (I search Google Images till I find one that fits) and then bring up these pictures on a corkboard. That allows me to see my whole cast at once.
Another tool I use all the time is Scrivener’s name generator. Set your parameters (e.g., nationalities, male or female, etc.) and the name generator will give you hundreds of suggestions with just one click.

4. Think of it as an organizer
Scrivener lets you organize your project, and view it, in many ways.
I like to use folders for Act 1, Act 2, and Act 3. When I create a scene card, I can put it into the folder where I think it will logically fit. I can organize the scenes within the folders all I want, moving them around on the corkboard, or up and down on the left side panel.
There’s an outline view that’s extremely helpful in letting you know where you are in your WIP. The corkboard view I shared, above, looks like this in outline view:

The same color codes are there, and the same synopses. When you have a lot of scenes, you can look at the colors and decide if you need a yellow scene here, or a blue scene there.
If you are a “plotter,” you’ll naturally love all this. But “pantsers” will too! Why? Because you pantsers get all sorts of wild ideas as you write. So what do you do about them? You can jot scene ideas on an index card, even write some of that scene, and put it into a folder for later reference. You can move those cards around as you please. You can pants your pants right off in Scrivener. Then, when it comes time to bring a little order to your mess, Scrivener will help you do it.
5. Think of it as a word processor
You could use Scrivener for all of the above, and still choose to write your manuscript in Word. Even then, Scrivener is worth the price for the reasons mentioned above.
But you can also draft your books right in Scrivener. When you’re done, you can export your book as a Word document, ebook ready .mobi and .epub formats, and print-ready (e.g., for CreateSpace).
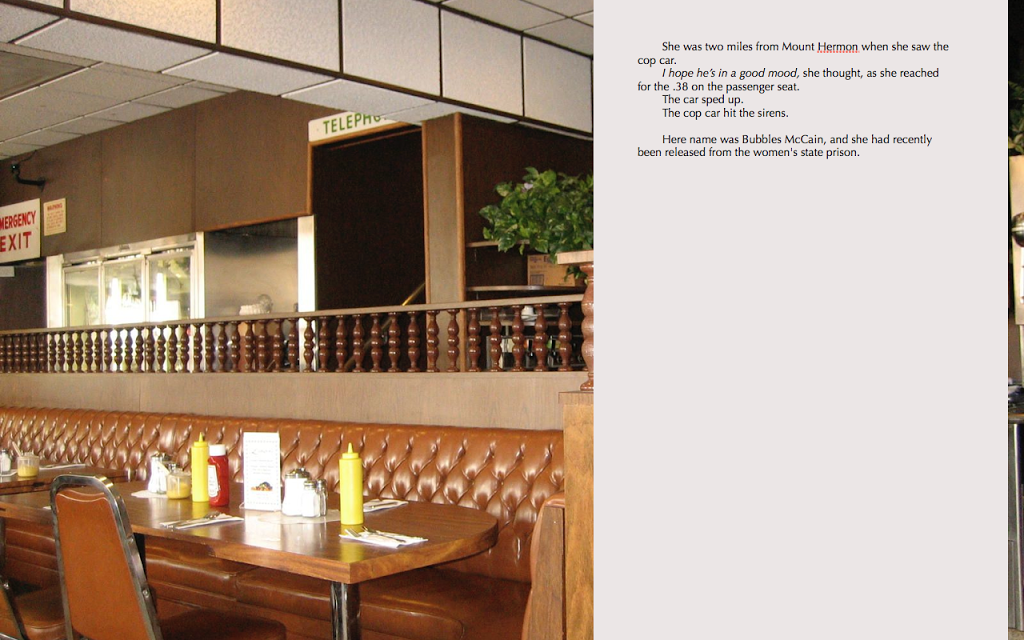
I’ll give you one little “whistle” I like. It’s called the Composition Mode. It brings up your manuscript on full screen so you can type away, and lets you choose a backdrop. I like to use the interior of my favorite Los Angeles deli, Langer’s. It makes me feel like I’m writing at one of their tables. Then I turn on the coffee house background sounds of Coffitivity and it’s like I’m right there, eating a pastrami sandwich and writing my next work of surpassing genius.
Okay, I’ve tried in this short space to give you an idea of what you can do with Scrivener right from the jump. So, once again, don’t let all the features intimidate you. You can learn as you go.
There are tutorial videos available for free at the sales site. And books, such as Scrivener for Dummies.
Bottom line, even if you get Scrivener and use it only to help plan, organize, and store your research, it’s a good investment. But if you decide to use it to write and create your own e- and print books, you’ll soon appreciate its power.
Any other Scrivener fans out there?